Temperature Pi Blanket – March Update

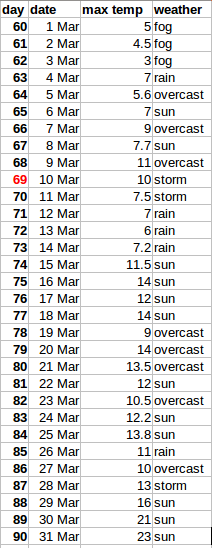
There is a saying that “If March comes in like a lion it goes out like a lamb”, and vice versa. March certainly arrived tamely with three days of dense fog, not unusual where I live on the side of a hill; we often find ourselves up in the clouds, and the accompanying lack of wind means it can last quite a while.

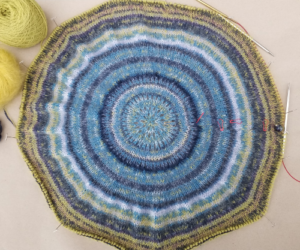
The blanket is getting big! I am already using two 150cm circular needles to comfortably accommodate the 576 stitches. The first half of the month was cold, but by the 16th temperatures were beginning to rise, and the month ended in the low 20s and very sunny. In fact the temperatures on the last two days of March were a UK 50-year record for the month.

The warmth at the end of the month – reaching just over 23 C on one day – is certainly helping to dry out the soil and open the buds on the trees and bushes. The daffodils are colouring the border of our driveway and the leaves are unfurling on the apple trees. Suddenly, it is all looking very green and yellow!

The colours of the blanket have changed from shades of blue to shades of green, too, even veering to yellow on the last two days of the month, and there have been a lot of sunny days, even if they have not been particularly warm. I have used nearly an entire ball of Rowan Kidsilk Haze Eve Green (denoting sun) just for the first three months of the year! In fact, there have been 30 days in the first 90 days of the year when the weather was predominantly sunny. That seems like a lot, given our latitude, and my experience of more than 20 years living in the same place!

I am now up to day 90, and have 576 stitches on the needle; the blanket is approximately 72 cm in diameter (unstretched), and I am very happy with my progress.

It’s not too late to join in and knit your own Temperature Pi Blanket. You can download the pattern and accompanying spreadsheet from Payhip
Temperature Pi Blanket – February Update

Good progress has been made this month, and it has been interesting to see the temperature variability. We had a week of really cold days, when the temperature rarely rose above zero, followed by almost balmy days of 10 – 13 degrees Celsius to close out the month.

The old name for February, in some parts of England, was Filldyke, and we can certainly get a lot of rain. This year, we had snow and ice instead, which of course fills dykes and ditches when it thaws! The soil is waterlogged, although a good few days of wind and sun have dried out the surface.

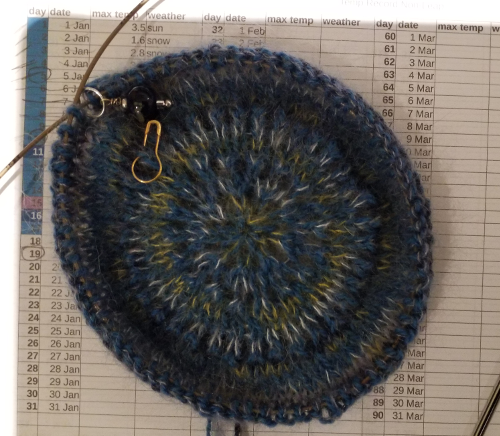
The left photo above shows the blanket so far, both January and February. The right photo shows an interesting section of February, 15th to 19th; the temperature stayed within the same band, dark blue 6 – 10 degrees, but the Kidsilk Haze modulates each day – overcast, overcast, sun, rain, wind – in a pleasing way so that no two days look alike.

I am now up to day 59, and have 288 stitches on the needle, and the blanket is approximately 48 cm in diameter. I really like how the colours move and fluctuate, and the Kidsilk Haze gives a lovely halo of warmth and comfort.

It’s not too late to join in and knit your own Temperature Pi Blanket. You can download the pattern and accompanying spreadsheet from Payhip

Temperature Blanket for 2021

I’m always looking for a new project for the New Year, and this year’s project will truly span the whole 365 days. I am going to knit a temperature blanket to reflect the weather where I live. But this won’t be the usual square or rectangle; it is a Temperature Pi circular blanket, based upon the principles laid down by Elizabeth Zimmerman, and I should be delighted if you would like to join me in this enterprise.

To begin at the beginning, you need good data for your locality. I am enormously lucky in that I have an electronics geek for a husband; he created a garden weather station for me some years ago, and since the station outputs its data to a website, I have everything I need to begin. Alternatively, you could use the BBC Weather website or other weather app to gather data. I have prepared an Excel spreadsheet for you to use in gathering data. It is certainly not too late to start.

As well as temperature, I have been recording the predominate weather condition each day. The blanket I have designed can be knit in two ways; you can use just the temperature for each day’s round, or you can add in an indicator of the weather condition to the temperature. I have done this by holding both the temperature yarn together with a strand of fine yarn such as Rowan Kidsilk Haze, to knit each round. This gives a lovely haloed warm texture, as well as a subtle colour modulation.

The second requirement is a good selection of colours for your temperature range and your weather indicator. I selected a palette of 9 temperature colours to range from -5°C to 40°C, in 5 degree increments; you may need to adjust your range based upon where you live; if you generally have temperatures lower than -5°C but never get above 30°C, then alter your range accordingly. I selected seven weather indicators – sun, overcast, rain, wind, fog, snow, and storm (which could be a combination of wind and rain, or wind and sun where I live) – and chose colours to reflect these from the Kidsilk Haze range.

Lastly, you need a pattern to help keep you on track. The Excel spreadsheet helps in keeping track of the day numbers and dates, the pattern gives colour and yarn suggestions, as well as details of increase rounds. There is a pretty lacy edge, charted and written, for the month of December to look forward to. The free pattern has been tech edited, and is available together with the spreadsheet by clicking here.

My progress so far on the blanket looks like this; you can see the marled effect of using the weather indicator thread together with the temperature: Small beginnings, but it will grow!

If you would like to be part of a community of knitters working on the blanket, then please follow @sb97979 (Granary Knits) or @veg_grower on Twitter, or @GranaryKnits on Instagram; post pictures of your progress using the hashtag #TempPi2021.

Sock Yarn Mittens

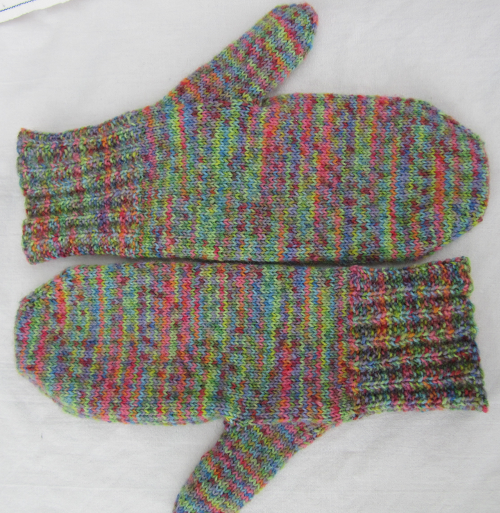
My second free pattern, designed to help you use up oddments from stash,  is for full mittens with gussetted thumb and an interesting ribbed cuff. This pattern was part of my Love Your Stash Challenge for 2019, in which I aimed to use yarn from stash for a series of simple accessories.

It is knit from the finger tip to the cuff, incorporating the pre-knitted thumb as you go, and uses any standard sock yarn.

You will need:

Any standard sock yarn (I used Regia for the sample , but West Yorkshire Spinners Signature Sock would also be a good choice). If you only have small quantities of multiple different sock yarns, use them up by randomly striping, or use different colours for the thumbs, cuff, or finger tips.

Your choice of circular needles or dpns (or AddiCraSyTrio Sock needles!) in the following sizes:

2.00 mm [UK/Canada size 10, US size 3]

2.25 mm [UK/Canada size 11, US size 2.5]

Stitch markers

Tapestry needle for weaving in ends

Waste yarn

The PDF version of the free pattern can be downloaded from the Payhip Granary Knits Pattern Store. Have a look through your stash, gather your tools together, and happy knitting!

Incorporating a Thumb in Top-down Mittens

There are, of course, several ways to knit a mitten, and I have tried most of them. My favourite technique, at the moment, is to knit the thumb first, place it on waste yarn, and then begin the mitten at the fingertip end, knitting down the hand until you reach the point when you incorporate the thumb. You can try the mitten on at every stage, to get the most comfortable width for you and the best length before you add in the thumb. It also has the advantage that the technique for casting on for full mittens is identical to that for toe-up socks, so if you are a sock knitter, the method is entirely familiar.

This technique is used in several of my mitten patterns: Fingerless Feather Mittens, Full Feather Mittens, and my free pattern for sock yarn mittens; this photo tutorial is an aid to those patterns. The thumb is incorporated into the mitten and a gusset is then knit to taper the mitten.

Thumb

First, knit your thumb, according to the pattern you are using. This can be a half-thumb (for fingerless mittens) or a full thumb.

Thread the first 2 stitches and the last 2 stitches of the round onto a small piece of waste yarn, and thread the remaining stitches of the thumb onto a longer piece of waste yarn.

Mitten

Work the first part of the mitten, from fingertip/fingerless mitt ribbing, to the point where the thumb joins the palm. The mittens are identical for the purposes of attaching the thumbs. Ensure you have worked the mitten to 2 stitches before the end of the round where you will attach the thumb. Using a piece of waste yarn, thread the two stitches from the beginning of the mitten round and the 2 unworked stitches from the end of the round onto the waste yarn, as you did for the thumbs.

Take one of the pre-prepared thumbs and remove the longer piece of waste yarn as you place half the remaining thumb stitches onto one of the mitten needles and the other half onto the other needle; the 4 stitches still on the waste yarn should be sitting adjacent to the mitten stitches also on waste yarn.

Round 1: Knit around the mitten and thumb once, the start of round now being the last mitten stitch of the round, adjacent to the first thumb stitch.

Round 2: ssk the first mitten stitch with the first thumb stitch, knit across the thumb to the last thumb stitch, k2tog the last thumb stitch with the next mitten stitch. Knit around the mitten to the end of round. [2 stitches decreased]

Round 3: knit

Repeat rounds 2 and 3 until all thumb stitches have been decreased.

Knit straight until mitten reaches your wrist bone, then add the cuff of your choice.

Once the gusseted thumb has been incorporated into the mitten, you can close the gap by grafting/Kitchener stitching the 4 stitches of the mitten with the 4 stitches of the thumb. See YouTube video https://www.youtube.com/watch?v=pJFRI-_EQeA for a great tutorial on Kitchener Stitch.


Simple Linen Stitch Cowl

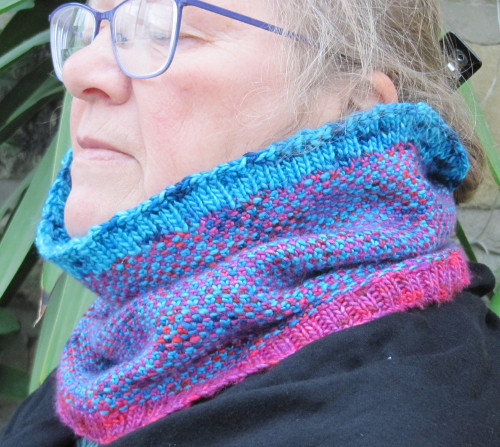
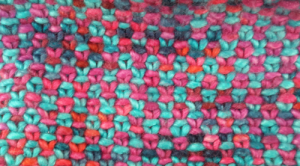
As I mentioned in an earlier post, I have been cataloguing my yarn stash and came across some hidden gems of yarns purchased long ago and with no plan for their use, and I decided to design a simple cowl that would use them up. This pattern is part of my Love Your Stash Challenge for 2019, in which I aim to use yarn from stash for a series of simple accessories.

The yarns are Louisa Harding Grace Hand-Dyed, a DK weight yarn, in two colours. I have two skeins each of Coastal, a gorgeous bright turquoise, and Festive, a rich purple. Both yarns are tonal, and provide a total of 404 metres (440 yards), which is more than enough for a good sized cowl; in fact, I only needed one skein of each for the cowl, using virtually every scrap, so the rest will make a matching hat.

For this cowl you will need:

101 metres (110 yards) of DK weight yarn in colour1 and 101 metres (110 yards) of DK weight yarn in colour2

4 mm (UK/Can size 8, US size 6) circular needle, at least 40cm long (as long as you like if using magic loop)

5 mm (UK/Canadian size 6, US size 8) circular needle, at least 40cm long (as long as you like if using magic loop)

A stitch marker to mark the beginning of the round

A tapestry needle to weave in the yarn ends

The PDF version of the pattern can be downloaded from the Granary Knits Pattern Store. Have a look through your stash, gather your tools together, and happy knitting!