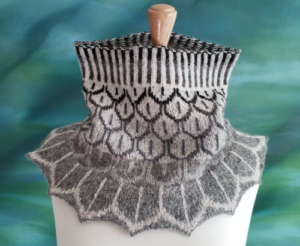
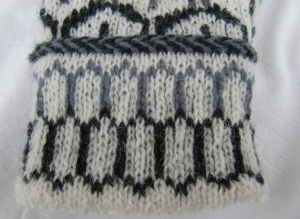
A knitted on lace edging is a neat and beautiful way of finishing a shawl or blanket of any size or shape. It involves provisionally casting on for the edge, and, as you knit the lacy edge, gradually incorporating the live edge stitches from the shawl. The incorporation usually takes the form of using ssk (slip, slip, knit) to slip one edging stitch and one shawl stitch, then knitting them together through the back loop. The join is performed on every right side row, so one shawl stitch is bound off for every two edging rows knitted.
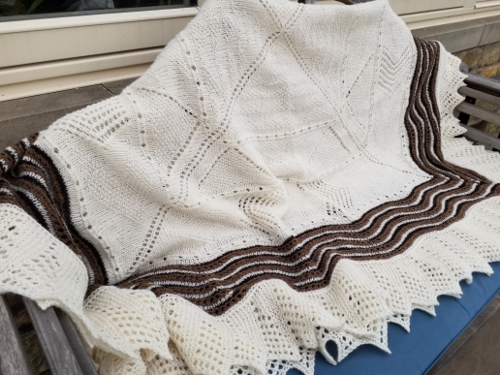
I shall illustrate this with a sample using the edging of the Wild Geese Hap (pattern available from the Granary Knits store), a square blanket with a pretty garter lace edging.
The setup up
The pattern for the edging will tell you how many stitches to provisionally cast on; using a length of waste yarn, cast on the required number of stitches. There are lots of tutorials on Youtube for provisional cast ons, some use crochet chains, some knit a few garter rows in waste yarn; experiment to find the one that is best for you.
Identify the point on the edge of shawl where you will be starting, right side facing unless otherwise specified. The pattern should tell you where this is but will probably be the point where your live stitches start. In the example below, on the Wild Geese Hap, I start 1 stitch in from the corner and work one side first before I come to a corner.

Using the working yarn for your shawl/blanket, work the first row of the edging until you reach the last stitch; the chart will probably show this as a ssk. Slip the last stitch of the edging knitwise, then slip the first live stitch you will be working on the shawl, also knitwise. Place the tip of the left-hand needle through the front of the two stitches on the right-hand needle, so that the needles are positioned as though you were about to knit them together through the back loop; knit them together through the back loop. You have made your first join stitch.

Turn the work and continue with the second row of the edging; this will almost certainly start with slipping the first stitch with yarn in front, which helps the edging to sit neatly and twists the stitch creating a decorative join.
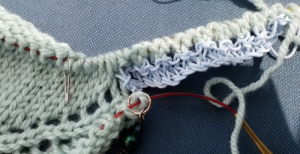
You will find, as you work, that you are knitting the edge on in an anti-clockwise direction around the shawl; it is possible to work clockwise, but most patterns for this type of edging will work anti-clockwise, because it is simpler.


Turning a corner
If the shawl or blanket you are working is circular, you will just carry on working the edging until you reach your starting point then graft the two edges together. If your shawl is triangular or square, however, you will have to turn the corner, and this will involve working extra edging repeat(s) in order to make a smooth turn. In the case of the Wild Geese Hap, the pattern has an obvious spine stitch marking the corner; I use this and the stitches either side of it for 1 repeat of the edging, i.e. I bind off 3 blanket stitches instead of 7. This is done by working multiple edging joins into 1 blanket stitch; here I work 2 into the first of the 3 corner stitches, 3 into the spine stitch, and 2 into the third blanket stitch.
Begin by working the first 2 rows of the edging as normal, joining into the first of the 3 corner stitches; on row 3, when you reach the point of joining, slip the first stitch, then put the needle into the previously worked blanket corner stitch and lift it up so that you can knit into the back of the two loops.

Continue with edging rows 4 and 5, joining into the corner spine stitch; continue with rows 6 and 7, until you reach the join stitch; slip the first stitch as usual, then put the needle into the previously worked corner spine stitch and lift it up so that you can knit into the back of the two loops.

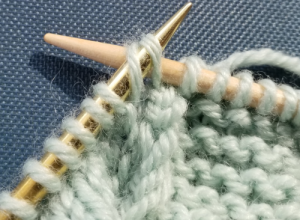
Repeat, so that you have 3 edge joining stitches into the one corner spine stitch.
Continue with the edging rows, and repeat the joining of two edge join stitches into the third corner stitch on the blanket.

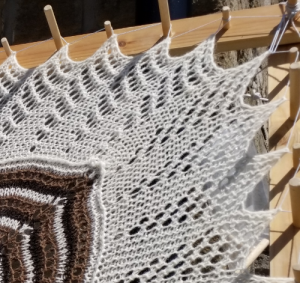
You should now have completed one repeat of the edging pattern turning the corner, binding off three corner stitches.

Joining the end to the beginning
Once you have completed all the edging repeats and all the shawl/blanket stitches have been bound off, it is time to complete the edging by joining the live stitches to the provisional cast on.
For an invisible join, use Kitchener stitch/grafting; alternatively you could perform a three-needle bind off but this will leave a ridge on the underside of the shawl/blanket edge.
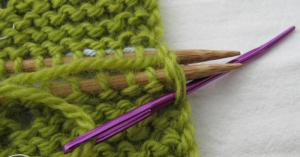
If you enjoy working Kitchener stitch, then this will hold no fears for you. If you don’t enjoy Kitchener stitch, well there is some good news – garter Kitchener is much much easier than stocking stitch Kitchener! Just to be on the safe side, I put a lifeline through the live stitches and through the cast on stitches (I didn’t need it but it was worth doing for peace of mind!). Also, I practised on a couple of samples, shown below in green yarn. It may seem like a lot of trouble to go to, but it ensured I did not make a mess of my edging when I came to do it for real.
If you prefer to see a video tutorial, then I found this one very helpful: https://www.knittinghelp.com/video/play/grafting-garter-kitchener-stitch
The trick, with garter Kitchener, is to ensure that your two rows of stitches are aligned properly. You are going to be creating one additional row, therefore, when knitting your final edging repeat, you omit the very last row of the repeat as this is the row you will be creating with Kitchener stitch. You work on the right side of the knitting throughout.
The first step is to undo the provisional cast on, and place the stitches from the first row of the edge onto a needle. The needle should be facing the same way as the needle holding your live end stitches. I began, as you can see, from the blanket end and worked out to the pointed edge. The calabash pins are there purely to mark the right sides for me.

Cut your working yarn leaving a very long tail, at least 3 times the length of the seams to be grafted, to ensure you do not run out. Thread the tail onto a blunt-ended needle (mine is purple as you can see).
 First the set up: Put the sewing needle tip through the first stitch on the lower needle, purlwise, and pull the yarn tail through. Leave the stitch on the needle.
Put the sewing needle tip through the first stitch on the upper needle, purlwise, and pull the yarn tail through. Leave the stitch on the needle.
Now the repeated stitches start: Put the sewing needle tip through the first stitch on the lower needle, knitwise, and pull the yarn tail through. Take the stitch off the lower needle.

Put the sewing needle tip through the first stitch on the lower needle, purlwise, and pull the yarn tail through. Leave the stitch on the lower needle.

Put the sewing needle tip through the first stitch on the upper needle, knitwise, and pull the yarn tail through. Take the stitch off the upper needle. Then purlwise through the next stitch on the upper needle and leave the stitch on the needle.

Continue in this way, until all stitches have been joined. The mantra for garter Kitchener stitch is:
Lower Needle:
Knit and slip off, Purl and leave on.
Upper Needle:
Knit and slip off, Purl and leave on.

The completed graft on the hap blanket, in between the two pale blue lifelines, is invisible and lies flat.
I hope that you found this tutorial helpful and will be encouraged to try knitted on lace edges.
