Annat Royd is the third in my Yorkshire Collection of shawls and related accessories. It is a huge hug of a shawl, based on the triangular shape and knit in 4ply/fingering yarn. I chose two lovely non-superwash woolly yarns for my samples.
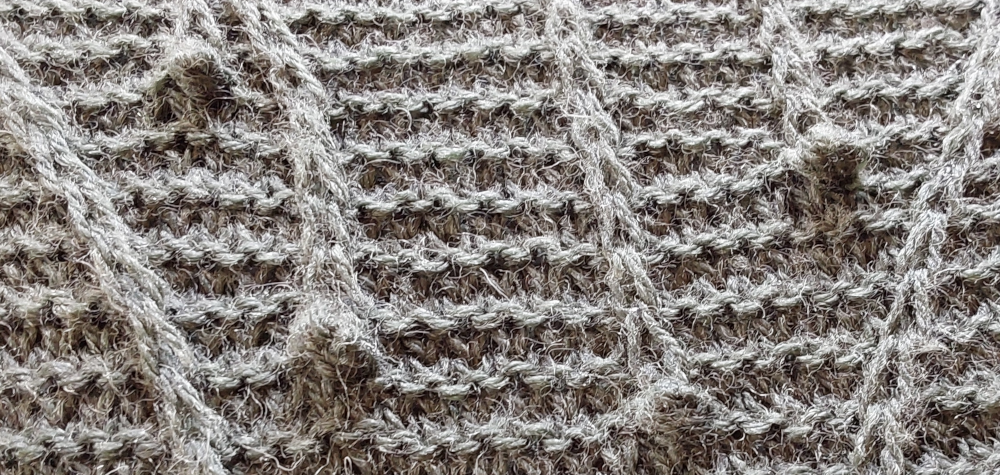
Annat Royd 2-triangle shawl in Birlinn Haar
The first is a straightforward triangular shawl knit in Birlinn 4ply 100% wool yarn, from the beautiful island of Berneray in the Outer Hebrides. It is a robust yarn which is a joy to knit with; it gives great stitch definition, essential for all-over lace patterns such as Annat Royd. I chose the colour Haar, a pale grey flecked with darker strands, perfectly named for the sea mist rolling in from the Atlantic.
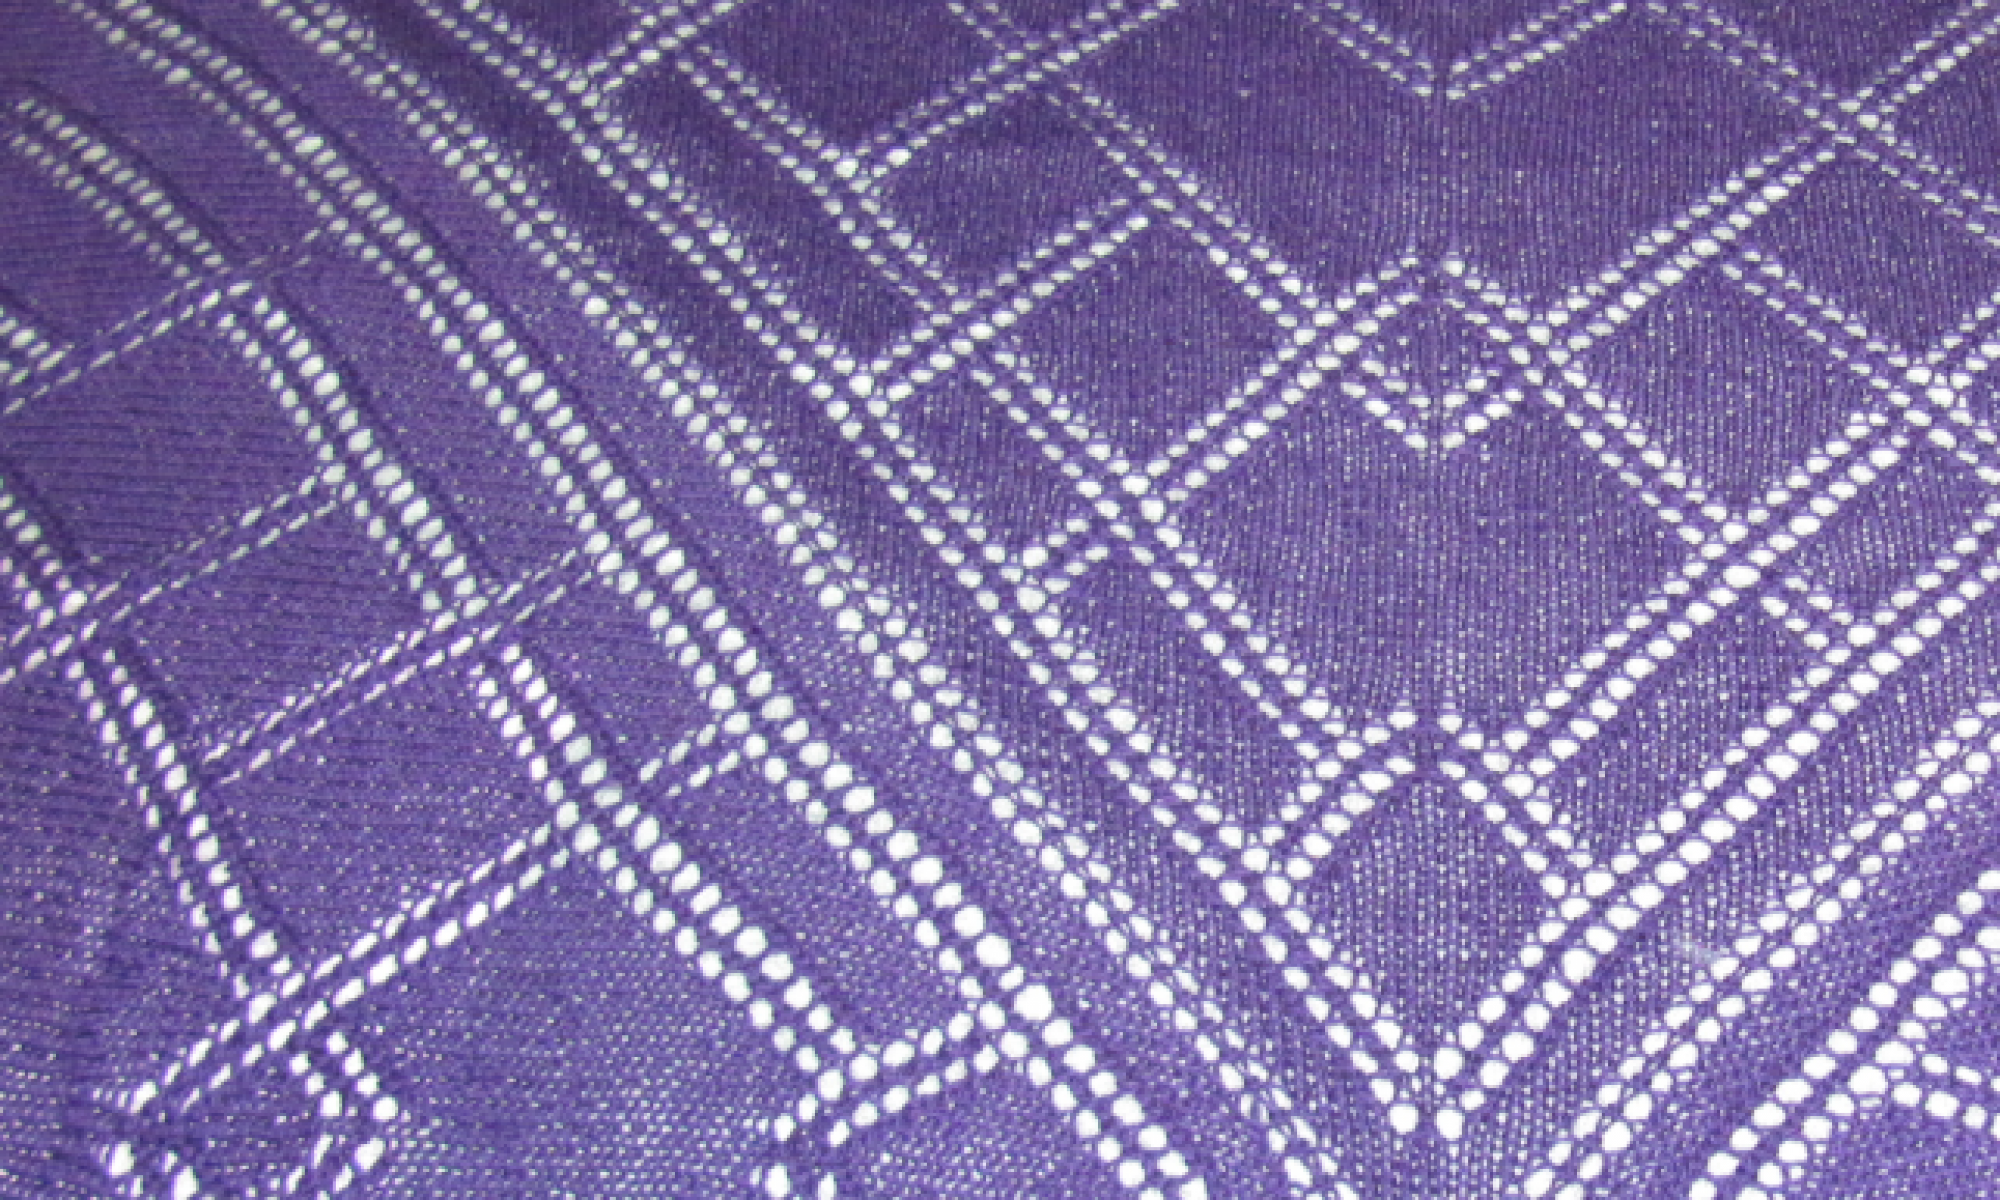
The second sample is a three-triangle shawl, which has a square profile. For this shawl, I chose the beautiful Doulton Border Leicester 100% Border Leicester 4ply yarn in the rich purple colourway, Hawnby Hill. I love this yarn, not only for its lovely stitch definition, but because the flock has a no-kill policy, meaning the sheep get to grow old and live out their lives on the farm. This is a shawl to snuggle up with on a cold winter’s evening.
3-triangle shawl in Doulton Border Leicester Hawnby Hill
Intarsia is a visually striking knitted fabric, with large blocks of colour or complex patterns not possible using stranded methods. Intarsia pattern instructions usually tell the knitter to twist the colours together, but don’t really specify how to do this to achieve a neat effect. I have found that just holding the two yarns in a particular way allows them to naturally lock together forming a line on the reverse of the fabric, without bumps or exaggerated twists. This is intuitive and quickly becomes a natural way of working.
The join between two colours shown on the reverse
The join when viewed from the front
This is how I do it.
Stocking Stitch Colour Joining
Work to the point at which the colours are to be joined, in this case, the join is a straight line
Hold the yarn you have been working with out of the way, and bring the new colour under the old. Here, the old colour is green (on the left) and the new colour is orange (on the right).
The view at the back of the work, old colour above, new colour coming from the right and below.
Start working with the new colour (orange).
The back view at this stage
Having purled back to the point of the join, this is what it looks like
After a few rows, the back of the piece shows the neat pattern of the join
The join front view
Garter Colour Join
The method here is the same as for stocking stitch at the front of the work, but for the back of the piece it is a little more complicated.
The back of the piece, the orange has been kit to the join, the orange yarn is still at the front of the piece
Bring the “old” working yarn through the gap to the back of the piece; “new” working yarn is the green below the orange
Holding the old orange to the left, bring the new green under and up
Pass the new green to the front of the piece over the old orange and adjust tension
Knitting with the new green yarn
The view of the back, showing the pattern for both stocking stitch joins and garter stitch joins are the same
Knots and bobbles add texture and interest to knitted garments and accessories, but there is no denying the fact that making them interrupts the flow of knitting. Bobbles, with their multi-row construction, can be such a distraction that people avoid adding them, which is a shame as they do look fabulous particularly tucked in amidst cables and other textured stitches. I find knots, however, are much easier to knit and look just as effective as bobbles, whilst taking less time to make and cause less disruption to the flow of knitting.
Knots can be made in any size, just use an odd number of stitches – 3 for small, 5 for medium, 7 for enormous (depending upon your yarn weight). They can be placed in the body of a garment or used as a type of picot along a cast off edge to add stretch and interest. Here I describe how I make the small cast off variety, followed by the larger surface detail knots. The basic principal is the same for any size of knot, edge or body.
Small Knots on a Cast Off Edge
Cast off up to the point where the small knot will be made, marked with a calabash pin. The cast off stitch on the RH needle, here, waits its turn.
Purl, knit, purl into the marked stitch (you could used k, p, k depending on the pattern, but purl first and last helps the knot to “sit” on the RS surface)
Reading from the left, pass the 2nd stitch on the RH needle over the 1st
Pass the 3rd stitch over the 1st
Pass the cast off stitch over the remaining knot stitch
The completed small edge knot, with the cast off stitches tucked behind it to enhance its prominence
The completed edge showing a small 3-stitch knot in the centre of the curved edge, flanked by two 5-stitch knots
Close-up of the small 3-stitch knot, an unobtrusive but neat detail on the edge of a cape
Large Knots as Surface Detail
Large knots add texture and interest on the surface of a garment, and I find they are easier to make than bobbles.
At the point where the knot is to be made, (purl, knit, purl, knit, purl) into the stitch designated (you could used (k, p, k, p, k) depending on the pattern, but purl first and last helps the knot to “sit” on the RS surface). Here I am working into a slipped knit stitch.
A clearer view of the five stitches in one
Reading from the left, pass the 2nd stitch on the RH needle over the 1st
Pass the 3rd stitch over the 1st
Pass the 4th stitch over the 1st
Pass the 5th and last stitch over the 1st
The completed large knot
The completed knot after working a few more rows/rounds of the fabric
The samples shown here are of the Yule cape, second in the Wheel of the Year collection of shawls and accessories. The pattern will be published in December 2024.