Knitting on a Lace Edge

A knitted on lace edging is a neat and beautiful way of finishing a shawl or blanket of any size or shape. It involves provisionally casting on for the edge, and, as you knit the lacy edge, gradually incorporating the live edge stitches from the shawl. The incorporation usually takes the form of using ssk (slip, slip, knit) to slip one edging stitch and one shawl stitch, then knitting them together through the back loop. The join is performed on every right side row, so one shawl stitch is bound off for every two edging rows knitted.

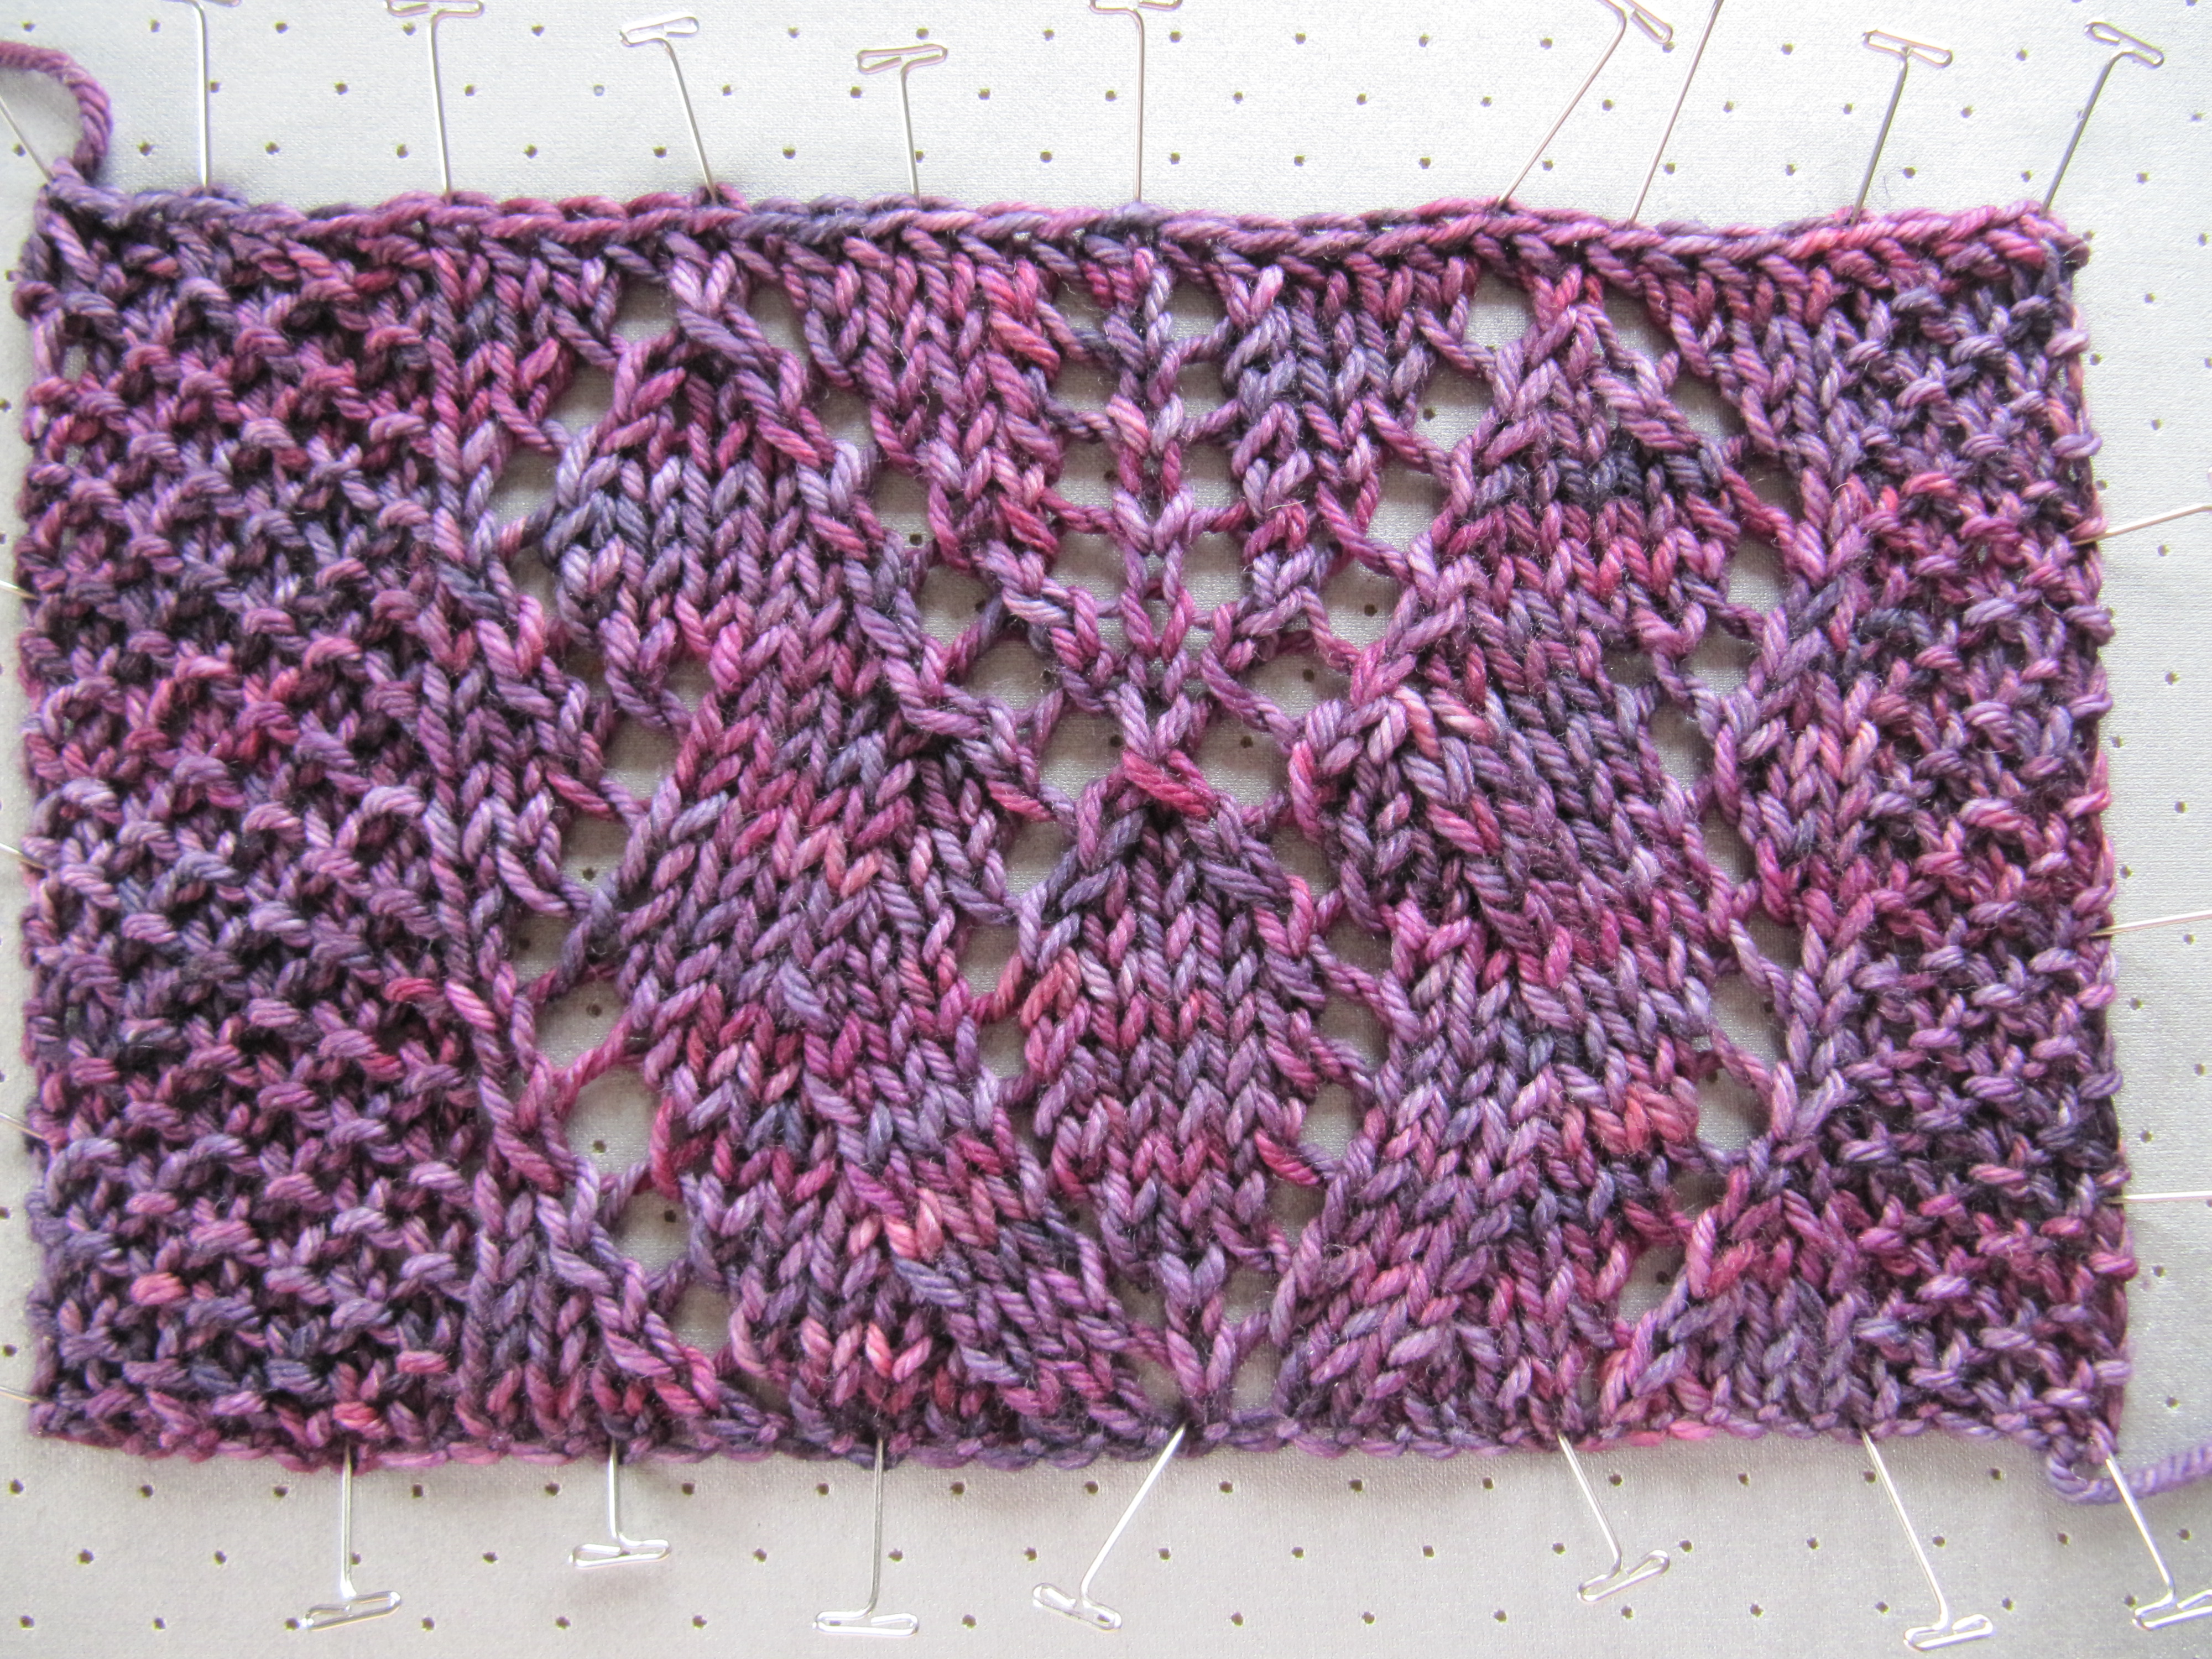
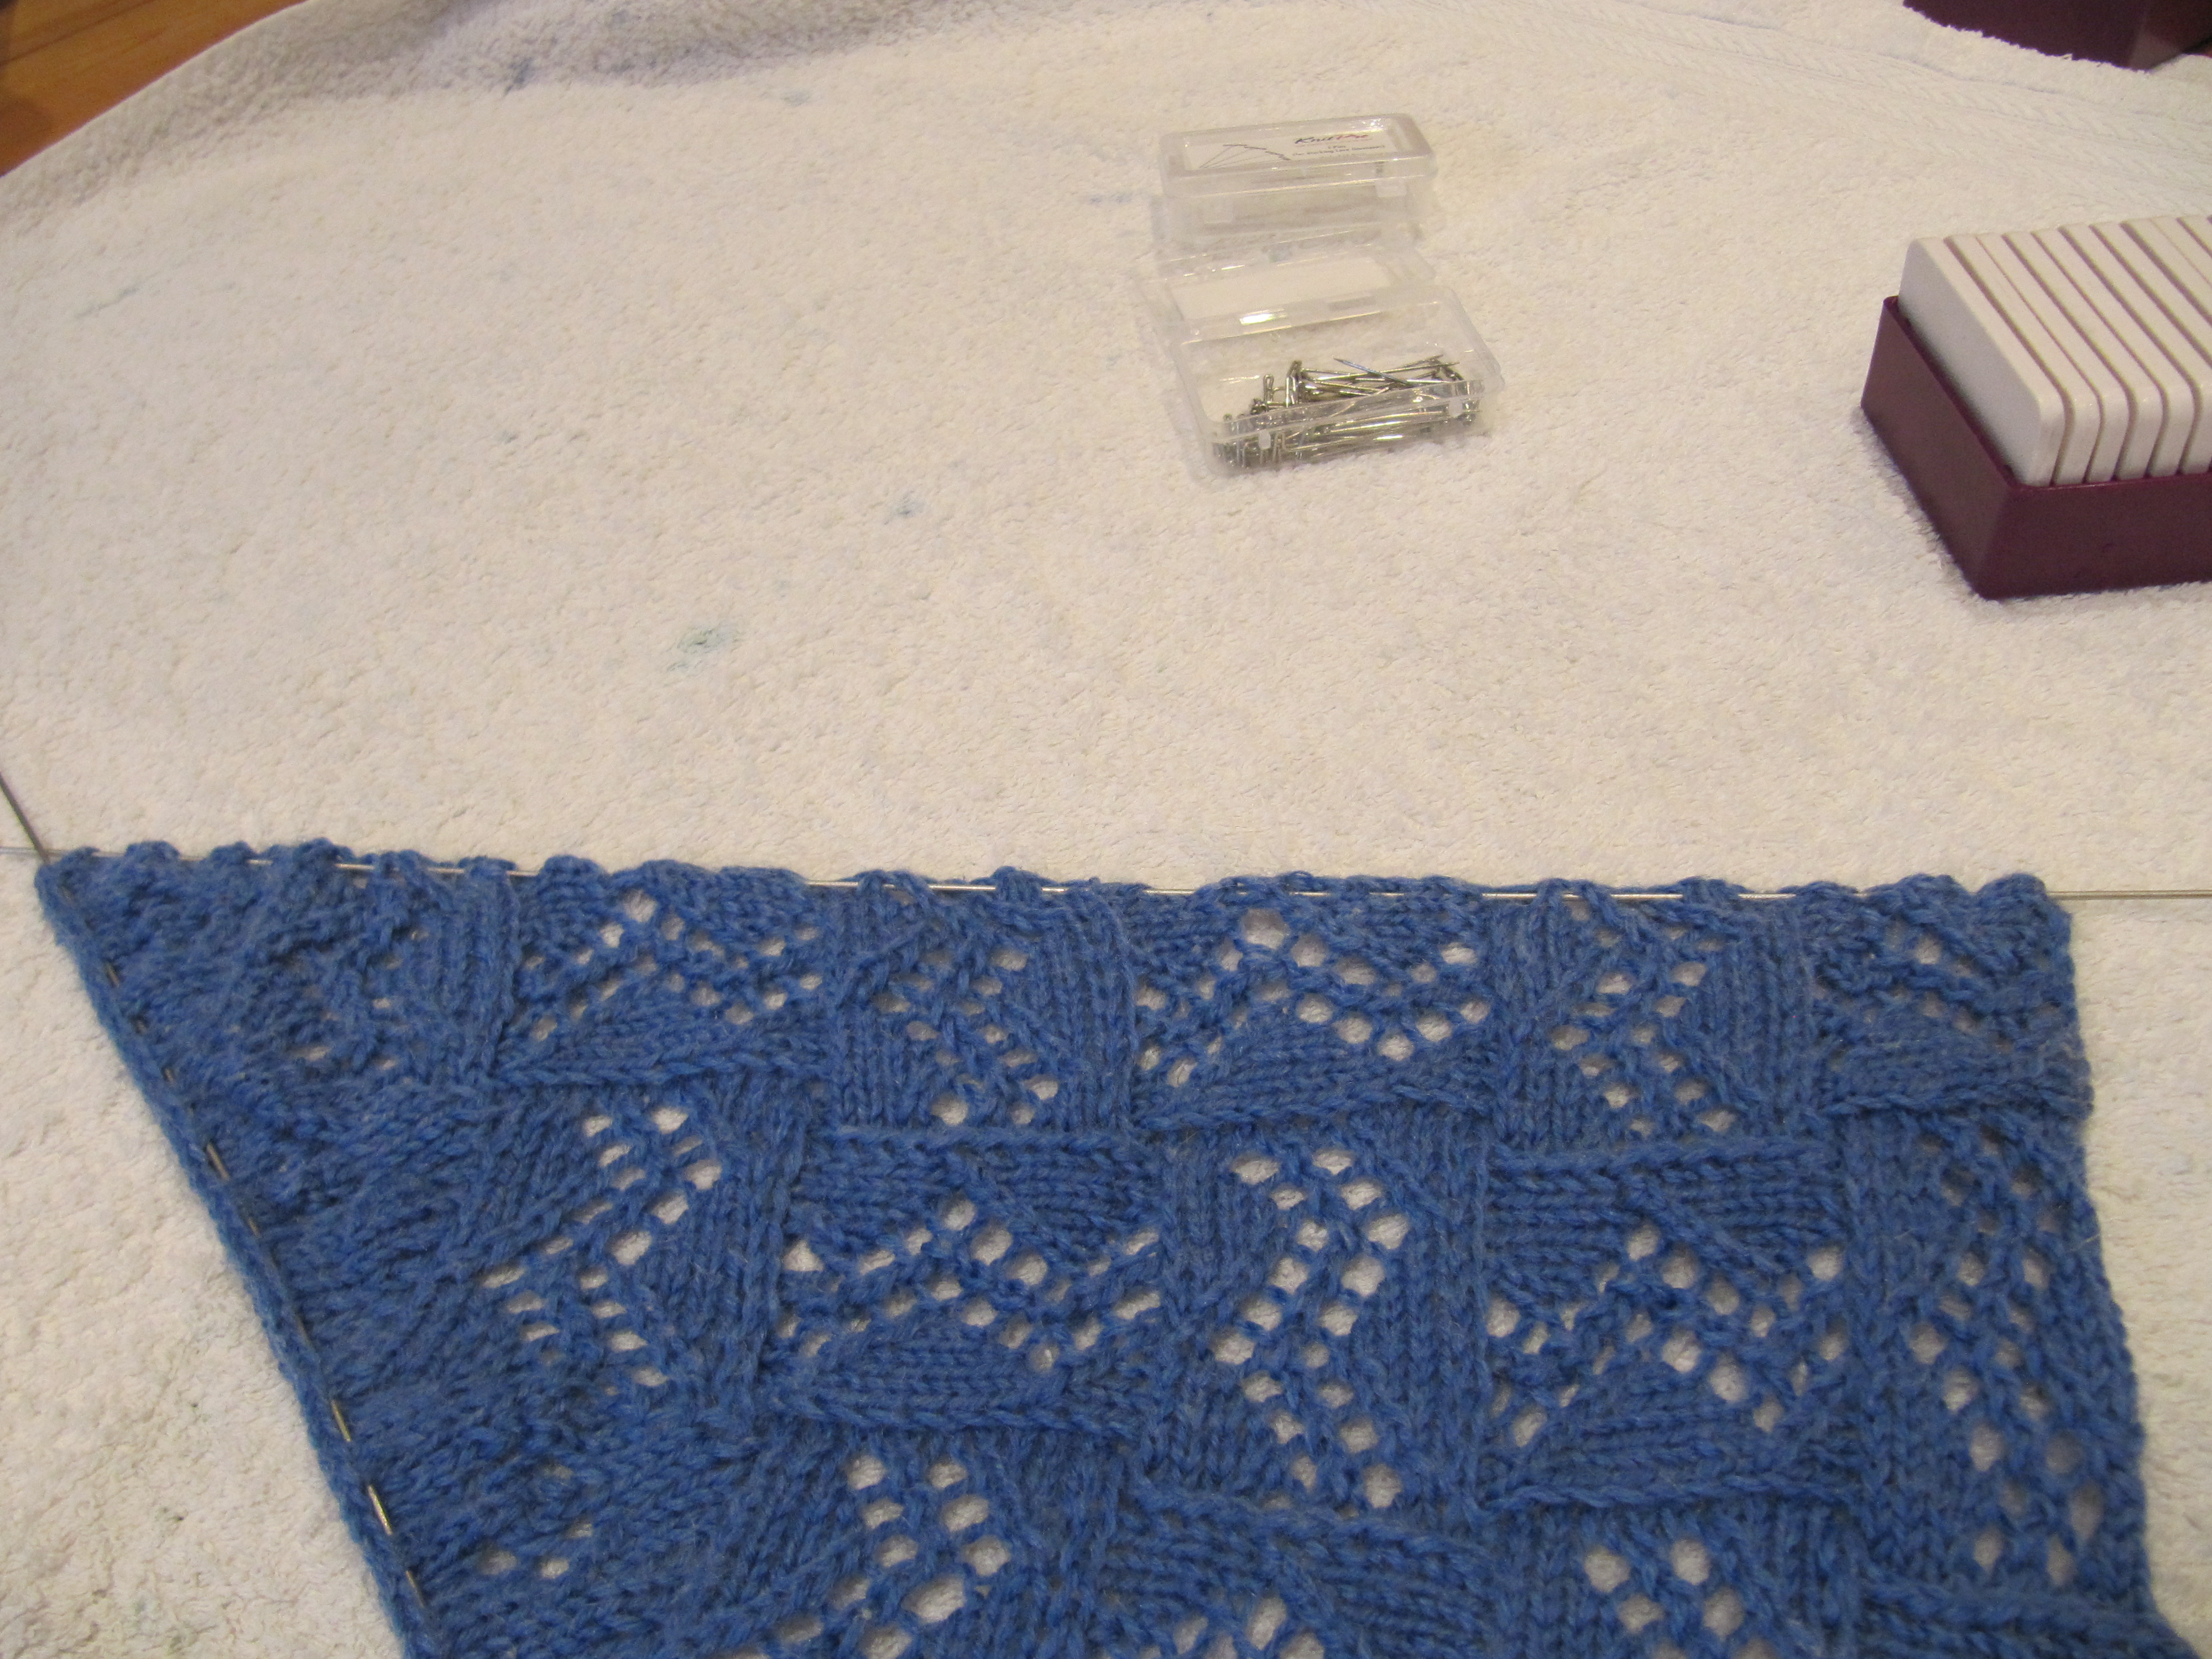
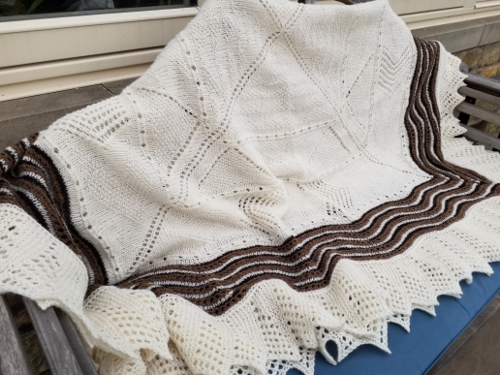
I shall illustrate this with a sample using the edging of the Wild Geese Hap (pattern available from the Granary Knits store), a square blanket with a pretty garter lace edging.

The setup up

The pattern for the edging will tell you how many stitches to provisionally cast on; using a length of waste yarn, cast on the required number of stitches. There are lots of tutorials on Youtube for provisional cast ons, some use crochet chains, some knit a few garter rows in waste yarn; experiment to find the one that is best for you.

Identify the point on the edge of shawl where you will be starting, right side facing unless otherwise specified. The pattern should tell you where this is but will probably be the point where your live stitches start. In the example below, on the Wild Geese Hap, I start 1 stitch in from the corner and work one side first before I come to a corner.

the ‘blanket’ (left) and the provisional stitches (right) positioned to begin joining

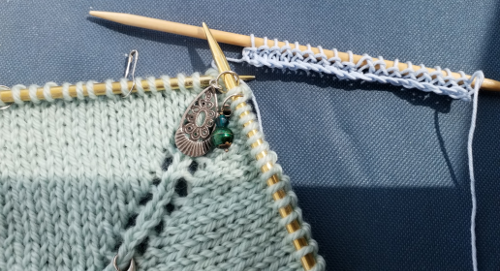
Using the working yarn for your shawl/blanket, work the first row of the edging until you reach the last stitch; the chart will probably show this as a ssk. Slip the last stitch of the edging knitwise, then slip the first live stitch you will be working on the shawl, also knitwise.  Place the tip of the left-hand needle through the front of the two stitches on the right-hand needle, so that the needles are positioned as though you were about to knit them together through the back loop; knit them together through the back loop. You have made your first join stitch.

the slipped stitches ready to be knit through back loop

Turn the work and continue with the second row of the edging; this will almost certainly start with slipping the first stitch with yarn in front, which helps the edging to sit neatly and twists the stitch creating a decorative join.

First 2 rows of the edging completed

You will find, as you work, that you are knitting the edge on in an anti-clockwise direction around the shawl; it is possible to work clockwise, but most patterns for this type of edging will work anti-clockwise, because it is simpler.

1 edging repeat completed
1 side of the ‘blanket’ edging completed

Turning a corner

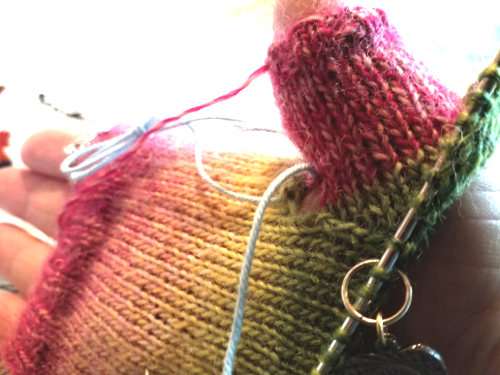
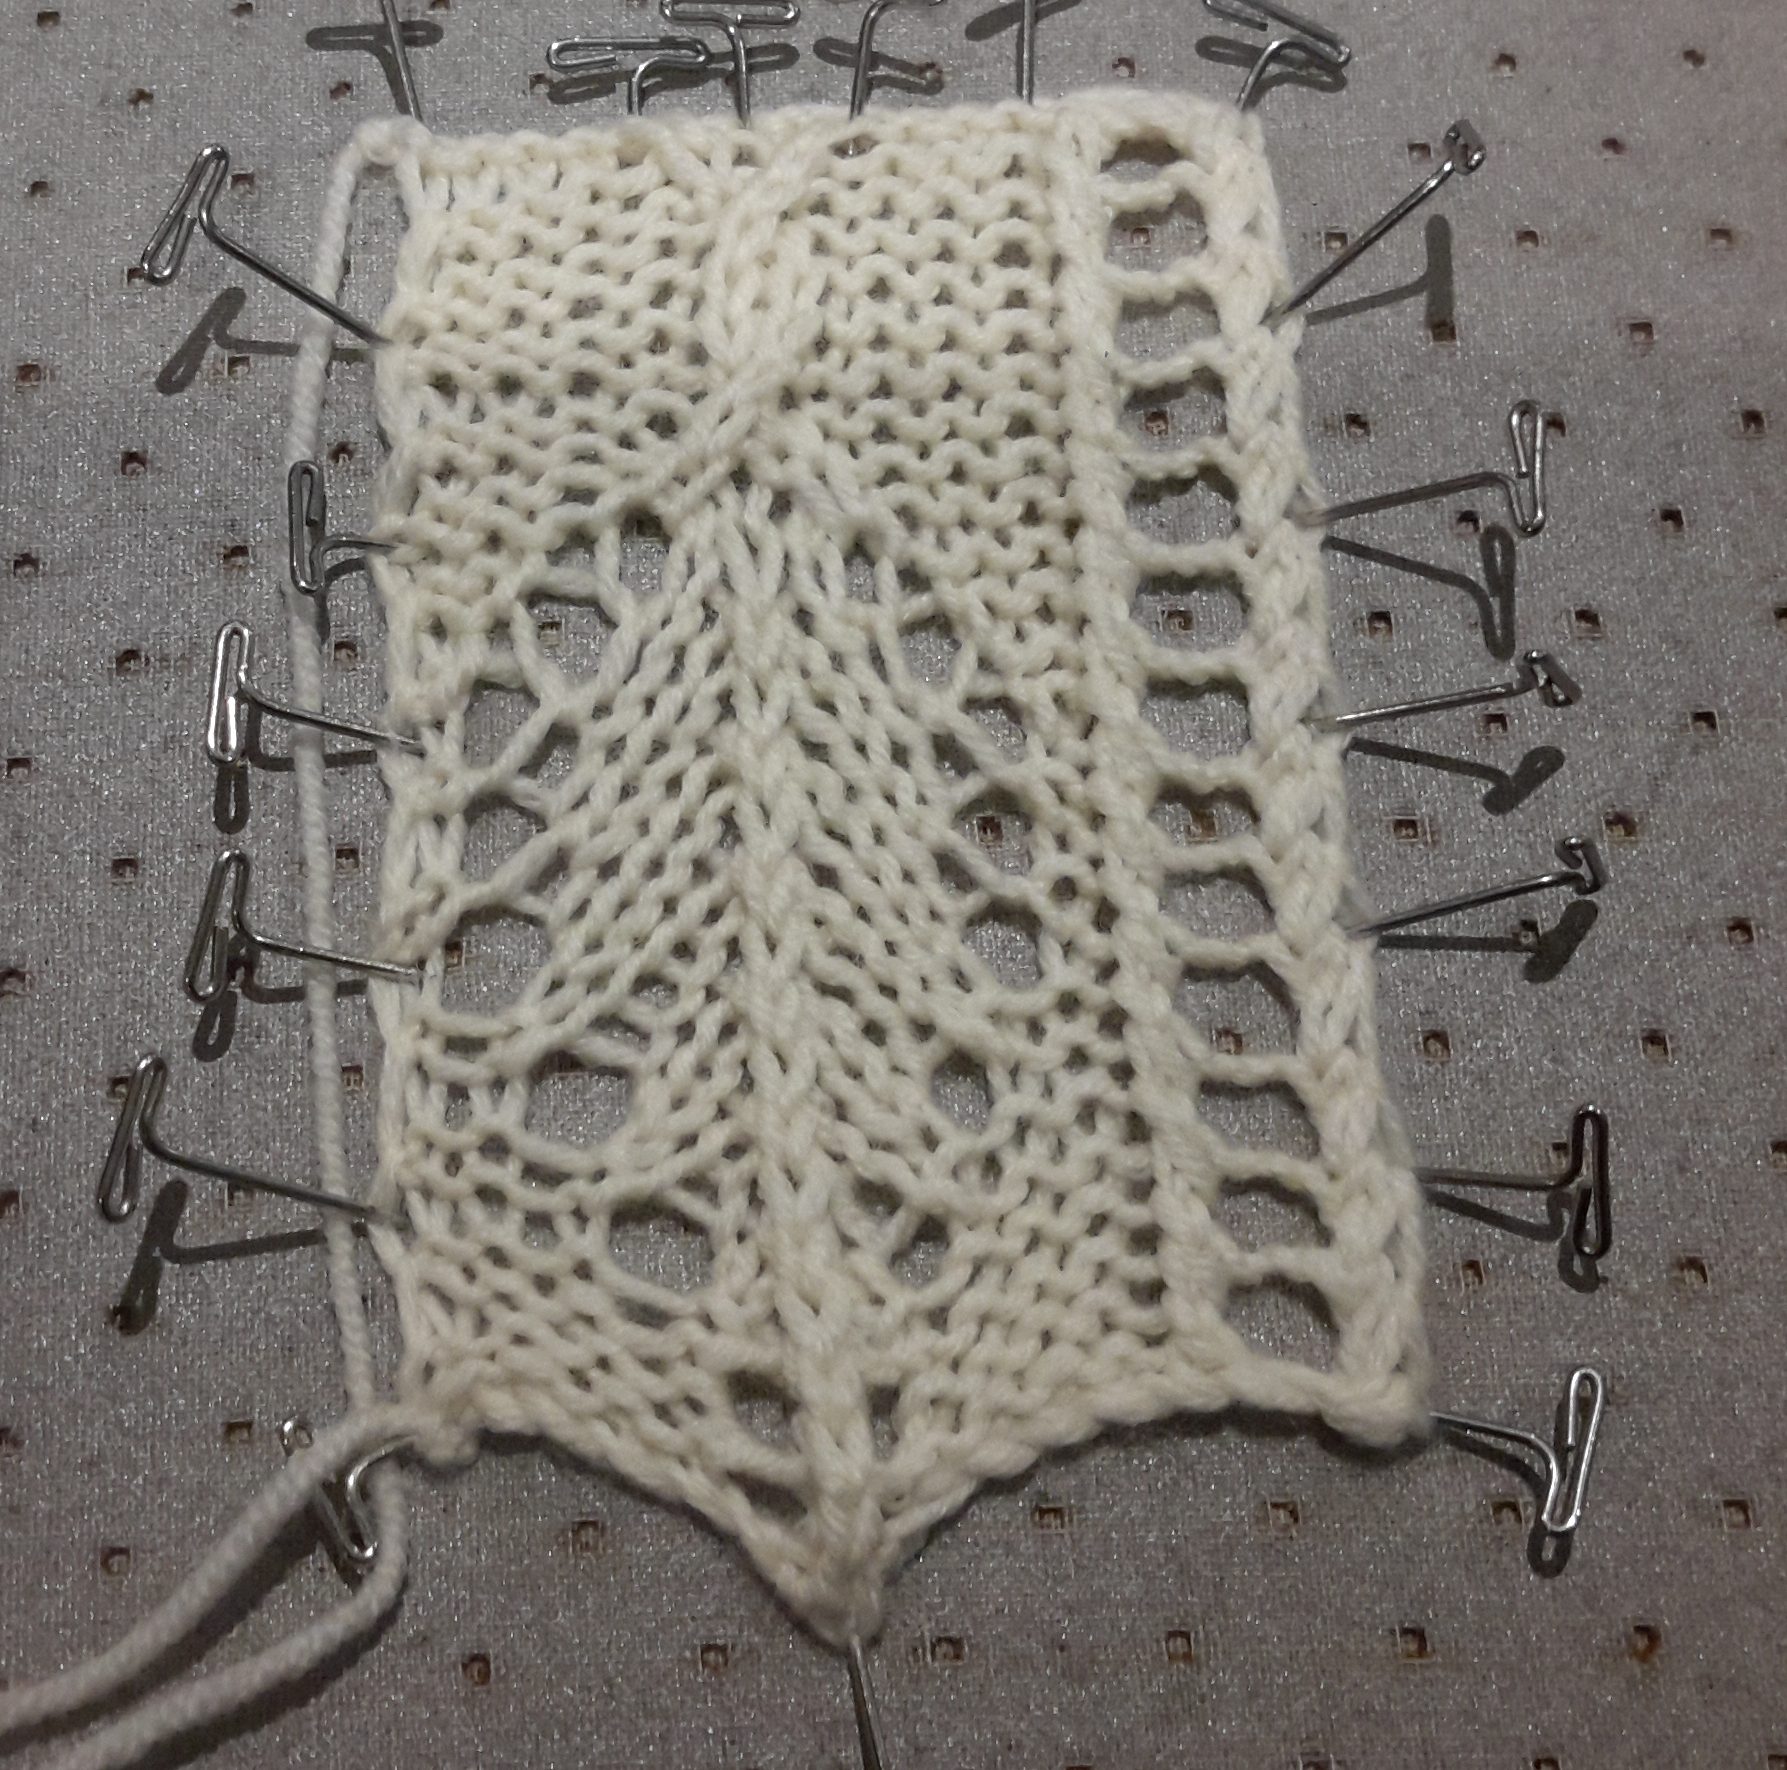
If the shawl or blanket you are working is circular, you will just carry on working the edging until you reach your starting point then graft the two edges together. If your shawl is triangular or square, however, you will have to turn the corner, and this will involve working extra edging repeat(s) in order to make a smooth turn. In the case of the Wild Geese Hap, the pattern has an obvious spine stitch marking the corner; I use this and the stitches either side of it for 1 repeat of the edging, i.e. I bind off 3 blanket stitches instead of 7. This is done by working multiple edging joins into 1 blanket stitch; here I work 2 into the first of the 3 corner stitches, 3 into the spine stitch, and 2 into the third blanket stitch.

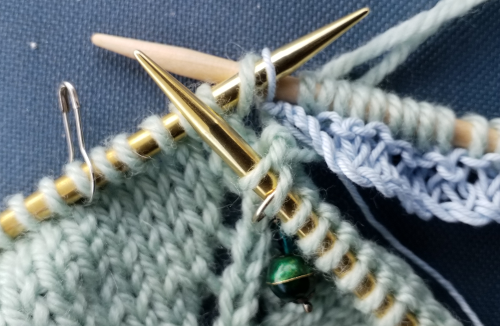
Begin by working the first 2 rows of the edging as normal, joining into the first of the 3 corner stitches;  on row 3, when you reach the point of joining, slip the first stitch, then put the needle into the previously worked blanket corner stitch and lift it up so that you can knit into the back of the two loops.

working into the 1st corner stitch for a second time

Continue with edging rows 4 and 5, joining into the corner spine stitch; continue with rows 6 and 7, until you reach the join stitch; slip the first stitch as usual, then put the needle into the previously worked corner spine stitch and lift it up so that you can knit into the back of the two loops.

1st working into the corner spine stitch
2nd working into the corner spine stitch

Repeat, so that you have 3 edge joining stitches into the one corner spine stitch.

Continue with the edging rows, and repeat the joining of two edge join stitches into the third corner stitch on the blanket.

joining into the third corner stitch

You should now have completed one repeat of the edging pattern turning the corner, binding off three corner stitches.

the complete turned corner

The hap corner on the blocking frame

Joining the end to the beginning

Once you have completed all the edging repeats and all the shawl/blanket stitches have been bound off, it is time to complete the edging by joining the live stitches to the provisional cast on.

For an invisible join, use Kitchener stitch/grafting; alternatively you could perform a three-needle bind off but this will leave a ridge on the underside of the shawl/blanket edge.

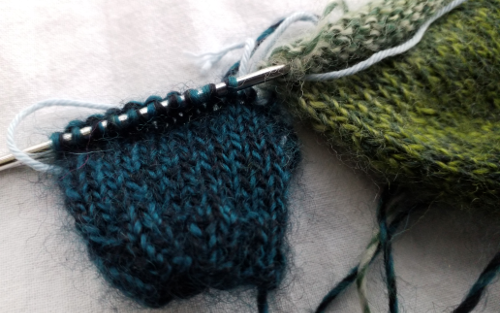
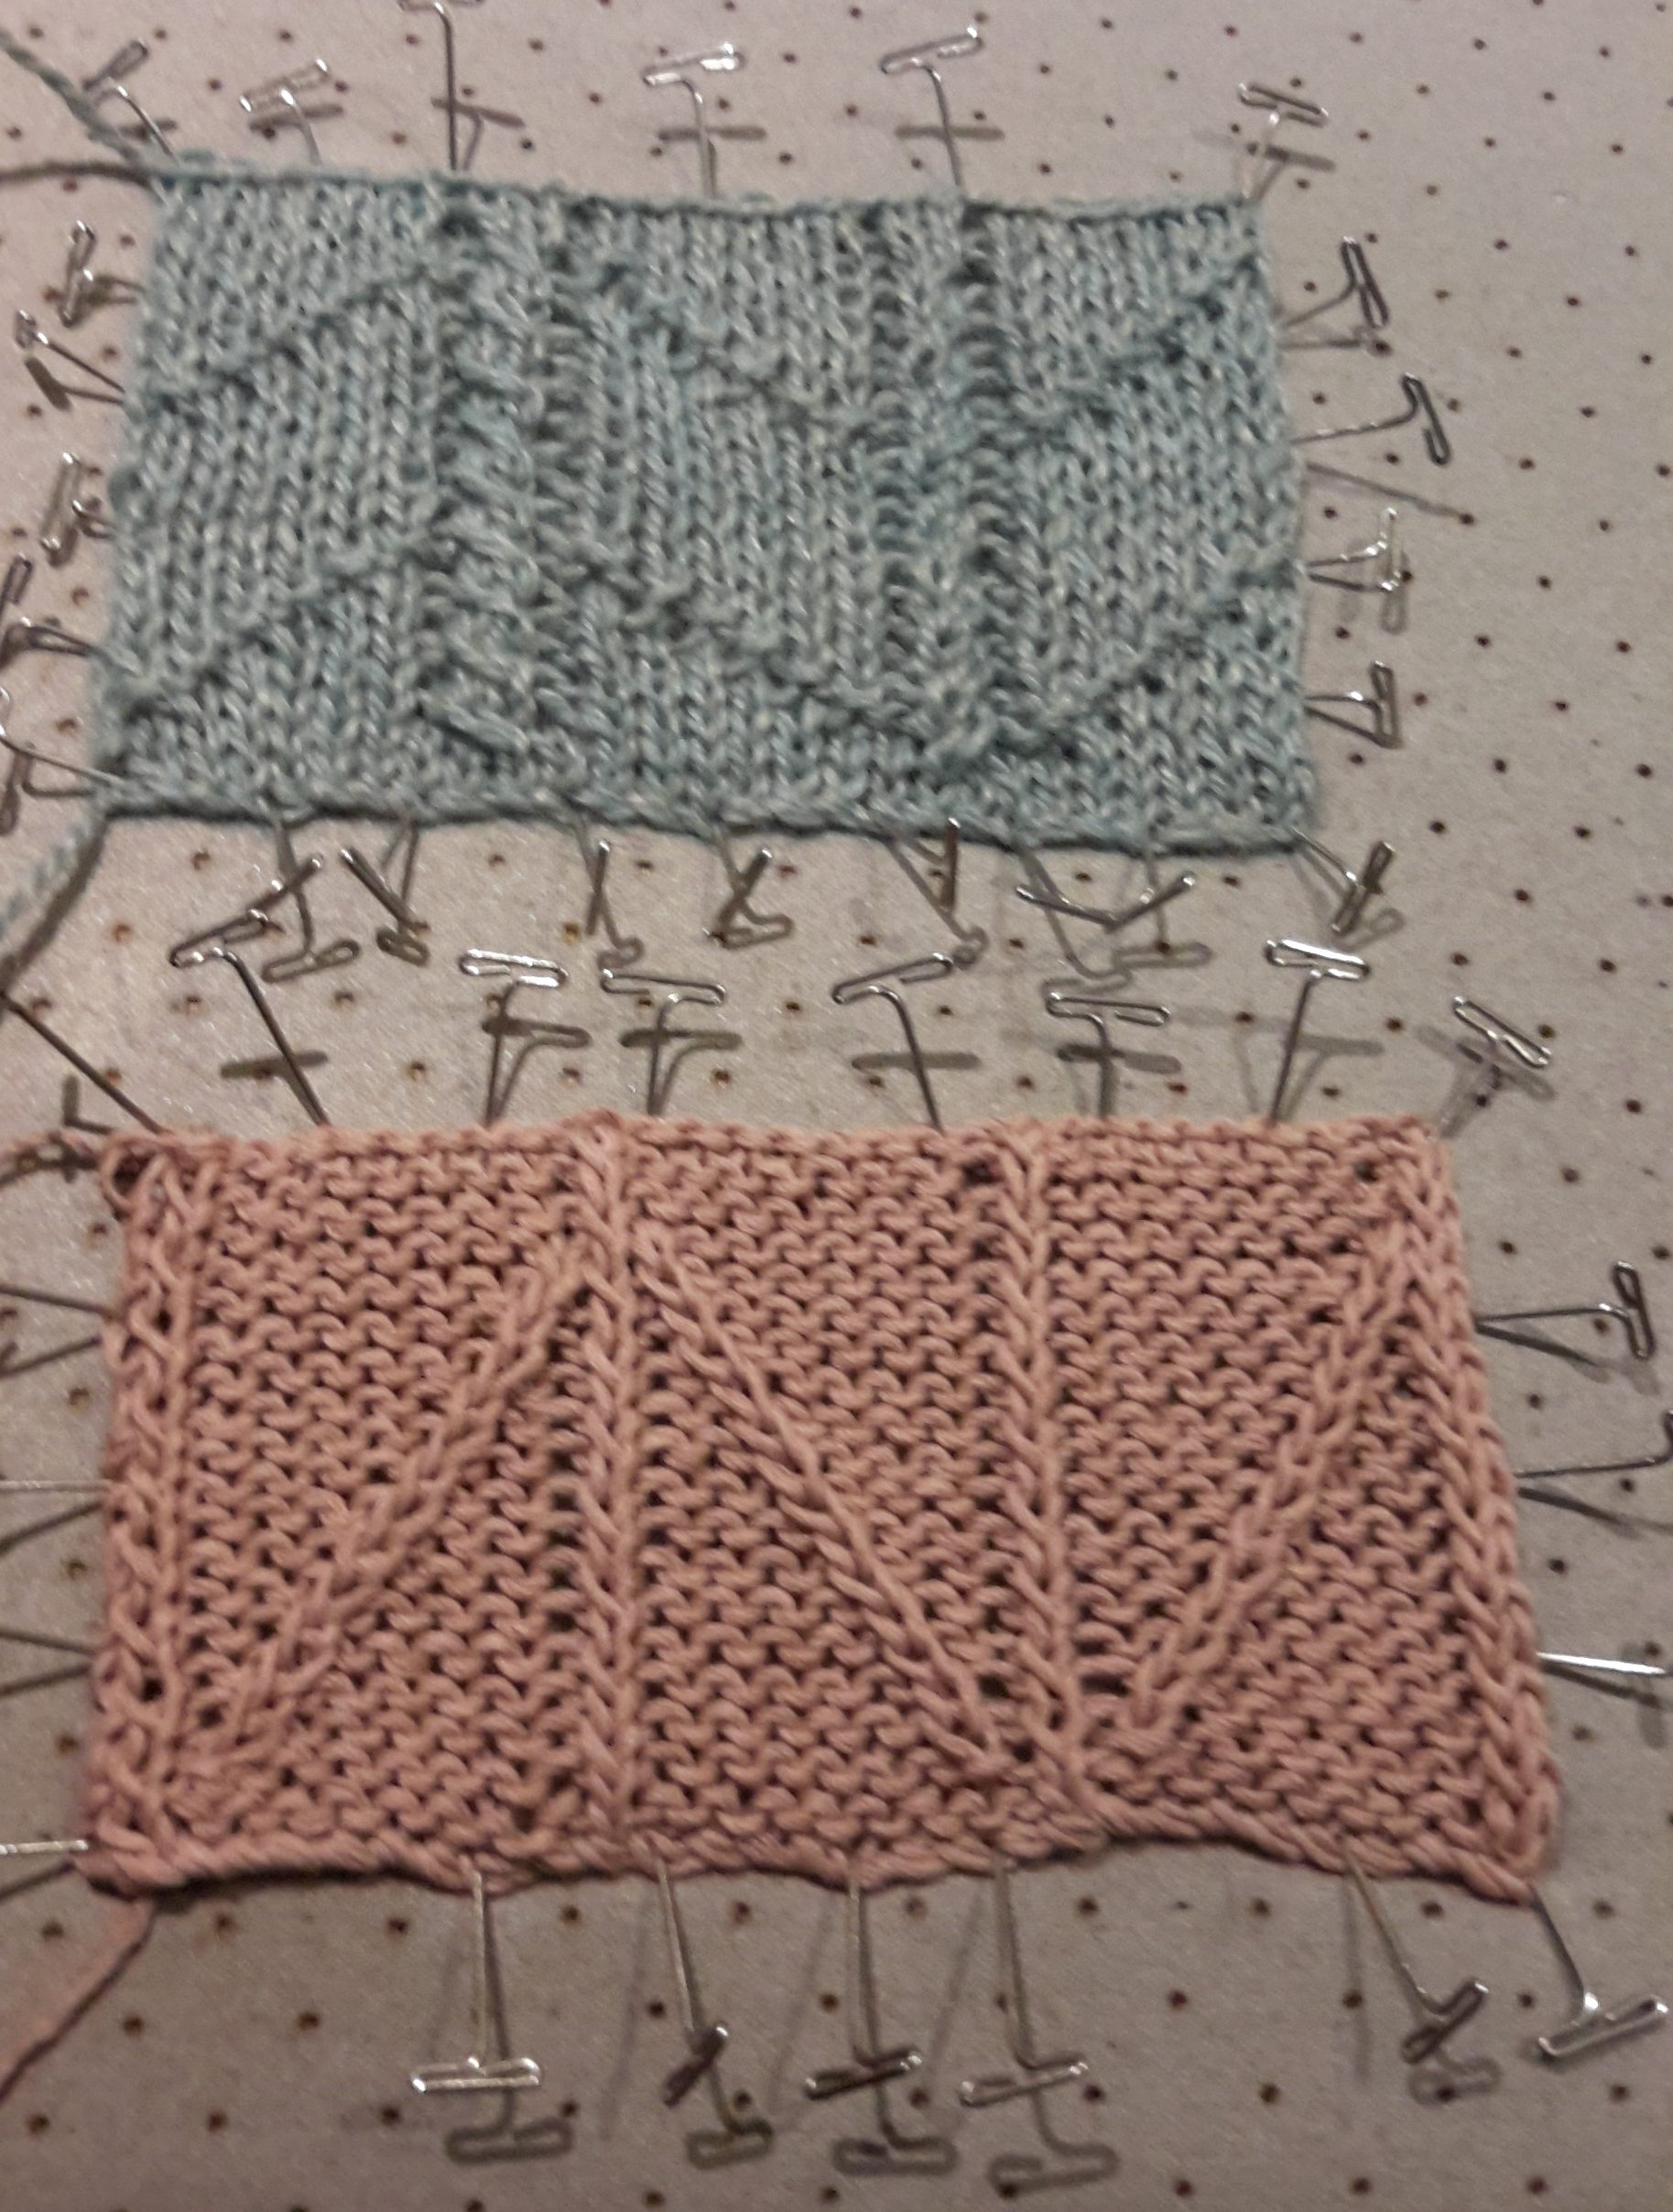
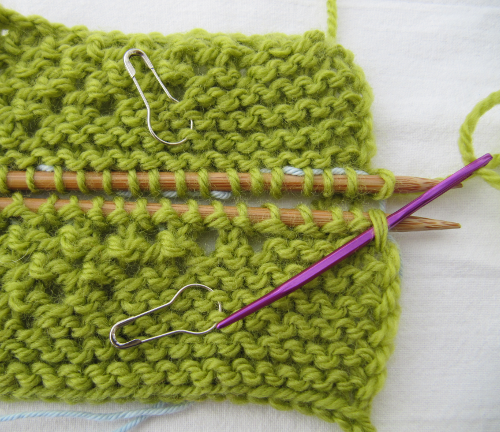
If you enjoy working Kitchener stitch, then this will hold no fears for you. If you don’t enjoy Kitchener stitch, well there is some good news – garter Kitchener is much much easier than stocking stitch Kitchener! Just to be on the safe side, I put a lifeline through the live stitches and through the cast on stitches (I didn’t need it but it was worth doing for peace of mind!). Also, I practised on a couple of samples, shown below in green yarn. It may seem like a lot of trouble to go to, but it ensured I did not make a mess of my edging when I came to do it for real.

If you prefer to see a video tutorial, then I found this one very helpful: https://www.knittinghelp.com/video/play/grafting-garter-kitchener-stitch

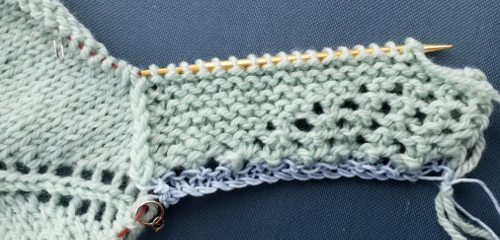
The trick, with garter Kitchener, is to ensure that your two rows of stitches are aligned properly.  You are going to be creating one additional row, therefore, when knitting your final edging repeat, you omit the very last row of the repeat as this is the row you will be creating with Kitchener stitch. You work on the right side of the knitting throughout.

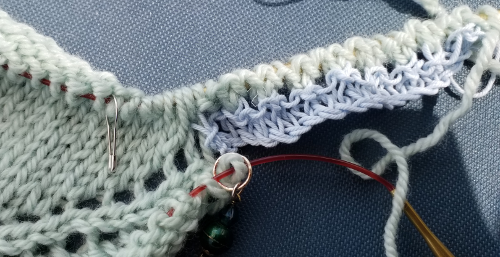
The first step is to undo the provisional cast on, and place the stitches from the first row of the edge onto a needle. The needle should be facing the same way as the needle holding your live end stitches. I began, as you can see, from the blanket end and worked out to the pointed edge. The calabash pins are there purely to mark the right sides for me.

Top piece is the end of the edging, lower piece is the start of the edging, right sides facing you

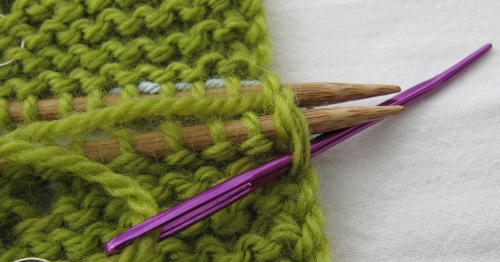
Cut your working yarn leaving a very long tail, at least 3 times the length of the seams to be grafted, to ensure you do not run out. Thread the tail onto a blunt-ended needle (mine is purple as you can see).

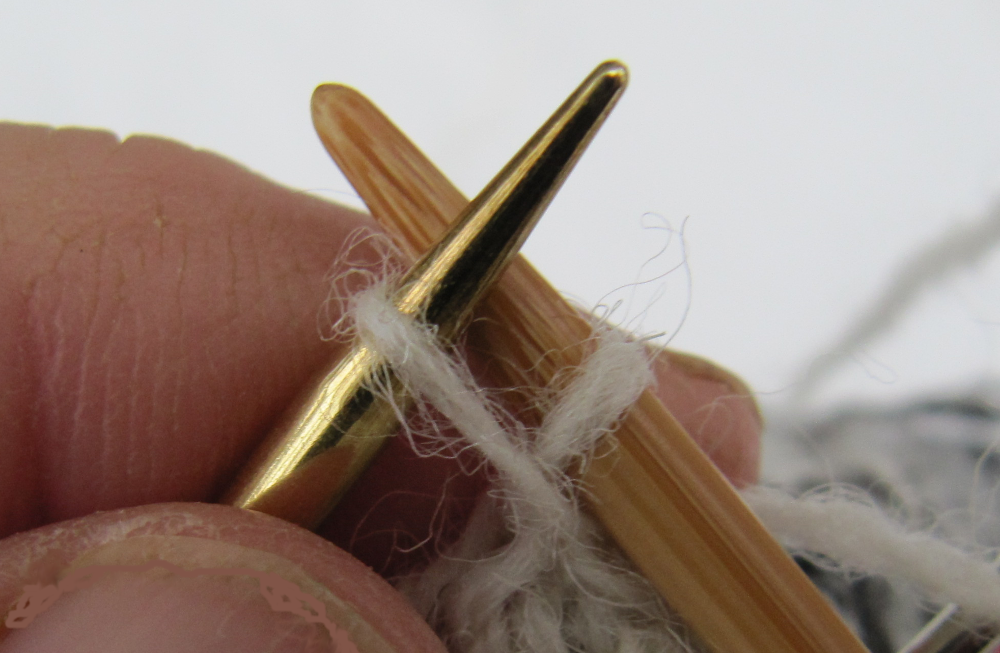
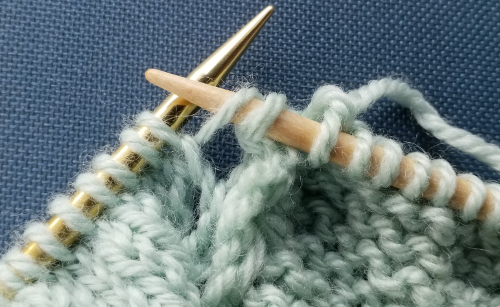
First the set up: Put the sewing needle tip through the first stitch on the lower needle, purlwise, and pull the yarn tail through. Leave the stitch on the needle.


Put the sewing needle tip through the first stitch on the upper needle, purlwise, and pull the yarn tail through. Leave the stitch on the needle.


Now the repeated stitches start: Put the sewing needle tip through the first stitch on the lower needle, knitwise, and pull the yarn tail through. Take the stitch off the lower needle.


Put the sewing needle tip through the first stitch on the lower needle, purlwise, and pull the yarn tail through. Leave the stitch on the lower needle.

Put the sewing needle tip through the first stitch on the upper needle, knitwise, and pull the yarn tail through. Take the stitch off the upper needle. Then purlwise through the next stitch on the upper needle and leave the stitch on the needle.

Continue in this way, until all stitches have been joined. The mantra for garter Kitchener stitch is:

Lower Needle:
Knit and slip off, Purl and leave on.
Upper Needle:
Knit and slip off, Purl and leave on.

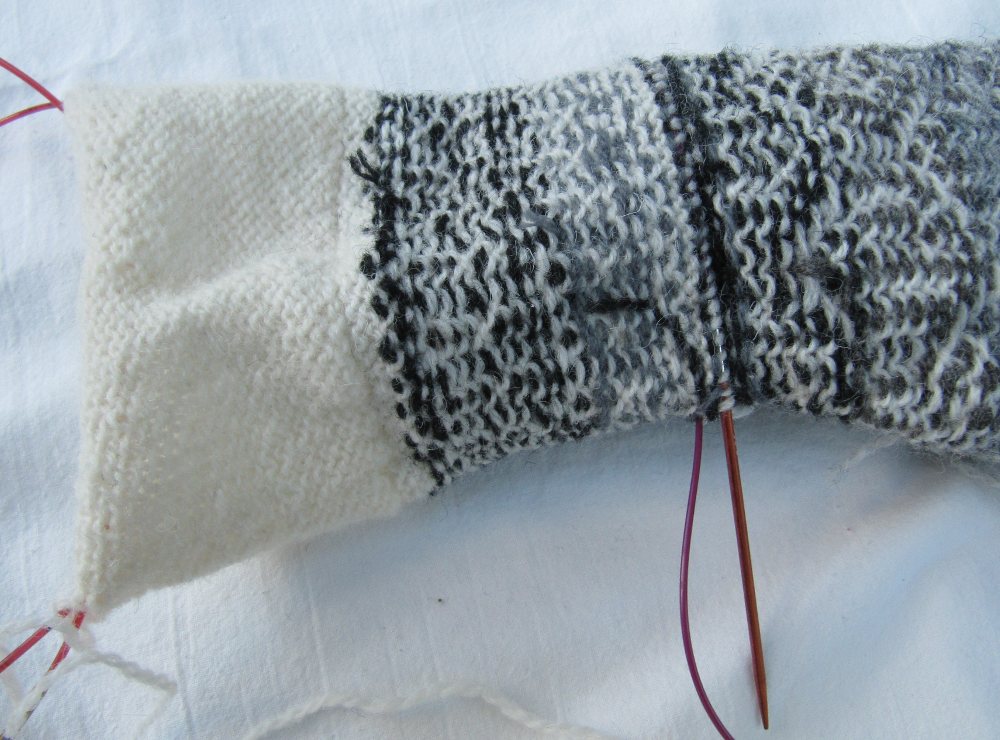
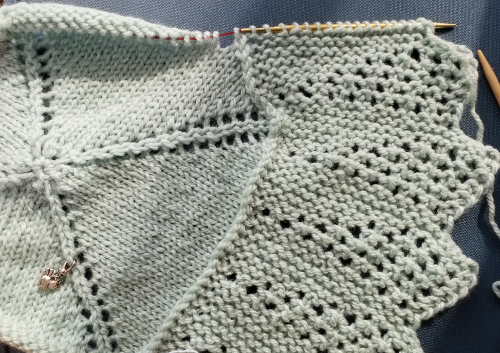
The completed graft on the hap blanket, in between the two pale blue lifelines, is invisible and lies flat.

I hope that you found this tutorial helpful and will be encouraged to try knitted on lace edges.

Incorporating a Thumb in Top-down Mittens

There are, of course, several ways to knit a mitten, and I have tried most of them. My favourite technique, at the moment, is to knit the thumb first, place it on waste yarn, and then begin the mitten at the fingertip end, knitting down the hand until you reach the point when you incorporate the thumb. You can try the mitten on at every stage, to get the most comfortable width for you and the best length before you add in the thumb. It also has the advantage that the technique for casting on for full mittens is identical to that for toe-up socks, so if you are a sock knitter, the method is entirely familiar.

This technique is used in several of my mitten patterns: Fingerless Feather Mittens, Full Feather Mittens, and my free pattern for sock yarn mittens; this photo tutorial is an aid to those patterns. The thumb is incorporated into the mitten and a gusset is then knit to taper the mitten.

Thumb

First, knit your thumb, according to the pattern you are using. This can be a half-thumb (for fingerless mittens) or a full thumb.

Thread the first 2 stitches and the last 2 stitches of the round onto a small piece of waste yarn, and thread the remaining stitches of the thumb onto a longer piece of waste yarn.

Mitten

Work the first part of the mitten, from fingertip/fingerless mitt ribbing, to the point where the thumb joins the palm. The mittens are identical for the purposes of attaching the thumbs. Ensure you have worked the mitten to 2 stitches before the end of the round where you will attach the thumb. Using a piece of waste yarn, thread the two stitches from the beginning of the mitten round and the 2 unworked stitches from the end of the round onto the waste yarn, as you did for the thumbs.

Take one of the pre-prepared thumbs and remove the longer piece of waste yarn as you place half the remaining thumb stitches onto one of the mitten needles and the other half onto the other needle; the 4 stitches still on the waste yarn should be sitting adjacent to the mitten stitches also on waste yarn.

Round 1: Knit around the mitten and thumb once, the start of round now being the last mitten stitch of the round, adjacent to the first thumb stitch.

Round 2: ssk the first mitten stitch with the first thumb stitch, knit across the thumb to the last thumb stitch, k2tog the last thumb stitch with the next mitten stitch. Knit around the mitten to the end of round. [2 stitches decreased]

Round 3: knit

Repeat rounds 2 and 3 until all thumb stitches have been decreased.

Knit straight until mitten reaches your wrist bone, then add the cuff of your choice.

Once the gusseted thumb has been incorporated into the mitten, you can close the gap by grafting/Kitchener stitching the 4 stitches of the mitten with the 4 stitches of the thumb. See YouTube video https://www.youtube.com/watch?v=pJFRI-_EQeA for a great tutorial on Kitchener Stitch.


Three-Needle Bind Off

Three-needle bind off is a very useful technique for joining two pieces of fabric. It can be used to create a firm shoulder seam on a sweater, to close the toe of a cuff-down sock (if you don’t want to use Kitchener stitch), or to complete a folded cuff or hem.

It is important not to stretch or pull the stitches too much, and to this end I am using 3 different sizes of needle: the inner cuff has been knit on a 3mm circular needle (brass); the purl bumps are picked up on a 2mm circular needle (dark wood); and the casting/binding off is performed with a 3.75mm double-pointed needle (light wood). The 2mm needle stops the picked up stitches being stretched out of shape, and the 3.75mm needle ensures that the cuff bind off lies flat and is not ruffled.

I shall illustrate the technique using the cuff of a mitten. The mitten has been knit top down, with a patterned outer cuff and a plain inner cuff, the inner cuff has been knit to the correct length for folding under, and the mitten has been turned inside out.

First, you need to pick up stitches around the beginning of the cuff. In the example mitten, these are purl bumps and are quite clear, being the background (white) stitches along the lower edge of a Latvian Braid.

The number of purl bumps to pick up should match the number of stitches to be bound off – in this case, the inner cuff has 60 stitches, so I have picked up 60 purl bumps. Beginning at the start of the round, place the tip of your 2mm needle into the purl bump as though you were purling a stitch, and lift the bump onto the needle; repeat for the second stitch, and so on until stitches have been picked up all around the cuff and you have the correct number of stitches on your 2mm needle.

Next, fold your cuff along the  edge line (this is a round of purl stitches at the fold point, designed to help the folded cuff lie flat) so that the live cuff stitches meet the picked up stitches.

In this photograph, the purl bumps are on the back dark wood needle, the live cuff stitches on the front brass needle. Take your largest needle, in this case 3.75mm (light wood), and put it through both the front and back stitch to knit them together.

Knit these two stitches together, and repeat for the second stitch on both needles. Then pull the first stitch you knitted over the second stitch, as you would do when performing a normal cast/bind off.

Repeat for the third stitch pair, and so on, until all pairs of stitches have been cast off. I like to neaten the join between first and last stitch, by placing my needle through the first stitch bound off, wrapping the yarn around it and pulling through to create another stitch, then passing the last stitch of the bind off over this stitch. Cut the yarn and pull through the last stitch on your needle.

The cast/bound off stitches lie flat and the fabric is unruffled. This gives a nice neat professional-looking finish.

This last photograph shows the right side of the cuff completed, with the Latvian Braid. The join at the first row below the Braid is undetectable.


The Joy of Swatching

90% of all knitters have never swatched before they launch into making a garment. I just made that statistic up, but I imagine you have either said yourself, or heard a knitting friend say, “I can’t be bothered to knit a swatch, I’ll just knit the sweater/cardigan/hat and I’m sure it will be OK”. Perhaps it will be OK, perhaps it won’t. You may have the knack of matching, exactly, the gauge of the test knit garment, but it is highly unlikely.

What is Gauge?

Gauge is the tension used by the designer when knitting the test garment, using the yarn and needle sizes specified. It is the tension you need to match in order to obtain the correct size/fit for your garment from the instructions given in the pattern.

Gauge is usually measured over a square of knitted fabric just over 10cm (4inches) square. The pattern will tell you if this is measured over stocking stitch (stockinette) or garter stitch, or over a portion of the pattern such as a lace repeat. Ideally the swatch should be washed in the way recommended by the yarn manufacturer and blocked to size so that the number of stitches across and the number of rows down can be measured accurately for a 10cm square.

If, having knitted your swatch, washed it, blocked it and measured it, you find that you have too many stitches/rows in your sample you need to use a larger needle; go up half a millimetre and re-swatch. If you find you have too few stitches/rows in your first sample, then you need to go down a needle size and re-swatch.

Some Sums

20170321_180906_rotated_cropped

The photograph above shows the difference a tiny 0.25mm needle change can have on a finished article. The top stocking stitch swatch was knitted on 3.75mm needles (the size recommended for the yarn) and the gauge I obtained was 20.5 stitches and 28 rows in a 10cm (4 inch) square, marked by the coloured threads. With the same yarn I went down a size to 3.5mm needles and my gauge was 22 stitches and 30 rows.

This may seem a fiddling small problem, but supposing you were knitting a sweater sized to be 50 inches around, using that yarn and 3.75mm needles, and the tension of the pattern says 22stsx30rows, but you are knitting at a tension of 20.5stsx28rows. For every 4 inches widthways you are knitting 1.5 stitches too many; that is 19 stitches too many in total on every row, or an additional 4 inches/10cm of fabric. For a loose garment you may be able to live with that, but for something that was meant to fit to the form, it would not work.

The length matters, too. This imaginary sweater may have a specific pattern that has been carefully constructed to require 300 rows, that is ten lots of 10cm/4inches/30rows. But your tension gives 28 rows to the 10cm, and so your garment, knitted to the pattern, will actually be the same number of rows but three inches longer than the pattern specifies.

And that is just with a difference in needle size of 0.25mm!

So overall, your lovely imaginary sweater is too large by a piece of fabric measuring 4 inches by 40 inches plus a piece of fabric measuring 54 inches by 3 inches; that is a lot of fabric and a lot of yarn to waste on a sweater that will not fit well when it is finished.

IMG_4155
Two swatches of the same pattern in Aran weight yarn, to determine tension for a tunic

IMG_4154

Alternatives to Swatching

Swatching and re-swatching takes time and yarn, and most knitters, having decided to knit something, want to get started. You may not have enough of a precious skein to knit a swatch as well as the garment; you may be constrained by time. Sometimes, knitting the first part (say, the welt and first part of the back of a sweater) is enough to give you an idea that you are on the right track with tension; it is not too much to have to unpick if the tension is out.

If you are knitting an item, such as a shawl, you can usually dispense with a swatch, as long as you are confident you have enough yarn to cover the eventuality that the finished item is larger than the pattern specifies. With items such as socks and hats, having an idea of your own tension using typical sock yarn or 4ply/fingering would be invaluable in ensuring a good fit. After all, you would not want to go to the trouble of knitting a Fair Isle Tam only to find that it is too tight to fit your head! Nor would you want to knit socks that bag at the ankles because your tension is not accurate.

Other reasons to Swatch

A swatch of a portion of edging, to test a pattern

When designing a garment or item, swatching is essential to the process. Unless you are a very skilled and experienced designer, it is very difficult to picture a pattern written on paper as the finished article/edging/cuff/etc. A swatch immediately shows up any flaws or inconsistencies in the design.

Designing is a process of refining until the desired effect is reached. This involves a lot of drawing, experimenting and swatching, and is rarely achieved by simply picking up needles and yarn and casting on. The next time you buy a pattern for a beautiful shawl, with a complex and challenging pattern, you can be sure that the designer spent months and months drawing and swatching, charting and reswatching, until s/he was heartily sick of the pattern!

So my advice to knitters is, bite the bullet and swatch. It may take you a couple of hours and an extra ball of yarn, but the finished results will be worth it.

20170215_080917
two swatches testing pattern ideas


What Are Stitch Markers?

The vast majority of knitters and crocheters go through life never having used a stitch marker. Even if they do need a marker for a project – to indicate a placeholder in a pattern repeat for instance, or to show where a round begins when knitting something in the round or crocheting in a spiral – they are quite likely to grab the nearest scrap of spare yarn, knot it into a little ring and slide it onto their needle or loop it through a crochet stitch.  It doesn’t matter that it is cumbersome to use, won’t slip easily from one needle to the next, or gets inexplicably knitted into the fabric! It is only needed the once and can be discarded at the end of the project.

Old cheap earrings dismantled and about to be turned into stitch markers

If, however, you are like me,  and you love knitting complicated lace patterns, or intricate Fair Isle designs, then you find you need a constant supply of markers, and the little yarn rings are no longer adequate, indeed they are shown up as the irritating awkward things that they are, actually impacting your creativity and slowing your productivity.image

image
Bracelet charms, old earrings and pendants – all get used to create unique markers

I took up lace knitting about eight years ago and immediately found that I had to buy some markers, as the pattern repeats were difficult to follow and the yarn loop markers were inadequate. I bought a set of five markers from my local yarn store, which had imported them from a women’s collective in India. They were fabulous, colourful paper beads made from recycled material, and they worked very well, but there was one small problem; the large ring that slips onto the knitting needle was a jump ring, and with use began to open slightly. It only took a very small gap to occur and my yarn kept getting caught in the ring, and I had to keep stopping and disentangling the yarn before I could continue knitting. I bought a second set, this time online, and since they were specially modelled polymer clay, they were quite expensive – but they were in the shape of chickens so well worth it! I experienced the same problem – the gap in the jump ring eased slightly open and the yarn snagged. So the price didn’t matter, the construction was the issue.

My husband, whose hobby is electronics, came up with a solution; solder the jump ring shut. He did this for the first set I had bought, and when I saw how effective the result was, I asked him to teach me soldering so that I could make some more markers.

image
Knitting the Nightsongs shawl using dozens of markers to keep track of the leaf pattern

I riffled through my jewellery box and came up with a couple of pairs of fancy, cheap earrings, the kind you buy to wear on holiday and then push to the back of a drawer when you get home. They were easy to take apart, and each pair yielded six or eight charms or beads. Once attached to 8mm jump rings – and soldered of course – these provided me with a tidy number of stitch markers.

Since then, I have made hundreds of stitch markers, from old bracelet charms and earrings, to new charms and beads found in the stash of shiny things left over from my early attempts at jewellery-making. Most I kept for myself, but some I gave to knitting friends and they encouraged me to try to sell them.
imageSince opening the Etsy store in February 2016 I have supplied stitch markers to USA, Canada, Hong Kong, France, Spain, Denmark, and lots to the UK.

Not content with making markers from charms alone, I now design and make themed sets of markers, around ideas such as Deep in the Forest and Dreaming of the Sea – two of my most popular designs. My customers appreciate looking at and handling beautiful things and these marker sets are beautiful! I have lots of ideas for more themes this year.

Dreaming of the Sea
Dreaming of the Sea

If you have never used stitch markers before, then take a look at my article on How to use Stitch Markers to see just how easy they are to use and what the benefits are in using them.

How to Use Knitting Stitch Markers

You may think that an article explaining how to use something as simple as a stitch marker is superfluous to requirements but I have been asked how and why I use them, even by experienced knitters, and I have found that a short demonstration is usually enough to convert someone to using (or at the very least trying) these extremely useful knitting tools.

This short video shows me knitting a fair isle tam in the round. The pattern has eight repeats, and so I am using eight markers, seven are the same design marker; the eighth is larger and is used to indicate the end of the round. The pattern I am knitting is the lovely Winter Forest Tam available free on Ravelry.

The finished tam looks like this, knitted in Debbie Bliss Fine Donegal, a lovely soft nubbly yarn perfect for fair isle projects:

cropped-IMG_4564.jpg

I hope that, having seen the video you, will try using stitch markers. I’m sure you will find they help you in knitting both simple and complex patterns.

Visit the Granary Knits Etsy store to see the huge range of stitch markers available.


Blocking for the Bewildered

I cannot say, with hand on heart, that blocking is my favourite part of the knitting process. It is marginally more interesting than sewing up a finished garment, which must rank as my alltime pet hate!, but less enthralling than actually knitting. However, it does make such a dramatic difference to the look of the finished item that it is well worth the effort of practising blocking on everything you knit (or crochet).

Blocking smoothes out wrinkles like an age-defying cream. It make lace lacier and Fair Isle fairer. It aids in sewing seams on sweaters, it shapes shawls, it smoothes socks into foot shapes and hats into head shapes. I now no longer ponder whether I should block something but instead wonder how many things I can block at once!

Tools for Blocking

If you knit a lot (and therefore block a lot, because by the end of this article you will be a committed blocker!),  it is well worth investing in some really good tools to help you get professional results.

Blocking mat
Blocking mat

The first essential is a blocking mat. You can buy blocking mats aimed at knitters but really these are just overpriced interlocking playmats so why not just buy playmats? Mine are black, but you can buy multicoloured sets of interlocking squares from toy shops at a fraction of the cost, and you can always buy more sets once you start knitting 6ft diameter circular shawls! They stack neatly against a wall until required, then can be formed into squares or rectangles depending upon your requirements. Once set out to the size needed for your item, lay a large clean towel over the mat to soak up any remaining water.

Next, a set of blocking wires is enormously helpful in making your square shawls square or your triangular shawls triangular. The set comprises two sizes of stiff wires for straight edges and a couple of bendy wires for curved edges.

Blocking wires and pins

To keep the wires in place you need stainless steel pins, and the strongest are T-pins, easy to press firmly into the blocking mat and won’t rust all over your delicate lace. Even if you do not use wires, you still need the pins to pull your work into shape and hold it there until it dries. You can also buy KnitPro Knit Blockers now, which are quick and easy to use, being a number of very sharp pins embedded into a solid plastic handle.

Other useful tools are sock blockers, mitten blockers, jumper blockers and hat blockers, and you can spend a lot of money equipping yourself with these. But if you only knit a couple of pairs of socks a year or the occasional sweater, the expense is not really worth it. Rudimentary sock and mitten blockers can be cut from stiff cardboard to your exact requirements, and hats can be blocked over inflated balloons (beanies) or dinner plates (berets or tams).

Items being blocked, especially Fair Isle and knitted lace, benefit from a thorough soaking in lukewarm water containing a no-rinse detergent such as Soak or Eucalan. Once they have been thoroughly immersed for at least 20 minutes (careful not to agitate or stir), very gently squeeze out the excess water and gently roll it in a clean towel. The item is now ready to block. To illustrate the blocking process I have blocked and photographed two typical items; a lacy triangular kerchief and a Fair Isle Tam.

Blocking knitted lace

Unblocked kerchief
Unblocked kerchief

To open up the lacy pattern of a shawl, or indeed any lace garment, it is essential to block. The first photograph shows the lacy kerchief hot off the needles. The yarn used here is a wool/silk 4ply/fingering. As you can see it is crumpled, and the pattern is not very clear. For a triangular shape such as this, with no individual points to be highlighted, a set of blocking wires and some blocking T-pins can be used.

Having soaked the kerchief for twenty minutes in lukewarm water and Soak, I gently

Wires threaded along the hypotenuse (left), and one of the sides

squeezed out the excess water, rolling the kerchief in a towel. I then set out my mat and clean towel on a nice flat surface and gathered my wires and pins.

First, thread a wire of sufficient length evenly along the hypotenuse of the triangle.  If there are lacy holes along that edge you can thread in and out of those, otherwise choose an even row of stitches. In the case of the kerchief, the hypotenuse edge has an i-cord cast off so I used this for the wire.

Next, thread wires evenly along the other two sides of the triangle.

Knit Blockers holding the wires in place

Lay the whole thing down onto the mat and begin pinning the wires in place, gently stretching as you go to form it into a right angle triangle. I needed to be especially careful with this kerchief as it is a piece if entrelac (pattern coming soon!) and I did not want to distort the entrelac rectangles as I blocked. Some patterns, particularly those for shawls, give a blocking diagram, which is extremely helpful when trying to pull the shawl into the correct shape.


Pay attention to corners to ensure they do not sag

IMG_4580

Leave the shawl for a couple of days to thoroughly dry out, then remove the wires and pins, and admire your lovely piece of knitting!

Blocking Fair Isle

Before blocking
Before blocking

For a square piece of Fair Isle, such as a blanket, blocking wires and pins can be used much like any other piece of knitting, but for illustration I have chosen a smaller but more complex piece to really illustrate the difference blocking makes. Here is Winter Forest Tam as it came off the needles. The tam is lumpy and misshapen and the pattern is difficult to see. It was knitted in Debbie Bliss Fine Donegal, a 4ply/fingering weight mixture of wool and cashmere. A tam is a beret, and therefore flat, so I need a flat form that is about 10 or 11 inches (26 to 28cm) in diameter and solid enough that it will not bend when I adjust the tam. Medium sized dinner plates are ideal, being slightly convex to help form the top of the hat. Most tams are knitted to that size, so plates are ideal.

As with everything else, the tam was soaked for twenty minutes and then gently squeezed and rolled in a towel.

Tam soaking
Tam soaking

Gently squeezed with plate at the ready

Plate inserted convex side towards the top of the tam, and cotton 4ply run through the welt to gather and pull gently

The purpose of the cotton 4ply stitched around the bottom edge of the ribbing is to keep the hat in place on the plate whilst it is drying. I tugged gently and tied it then checked that the pattern was evenly distributed around the rim.

The top of the tam
The top of the tam

The underside of the tam

Once satisfied with the blocking I stood the plate on a small bowl, which held the plate off the table top and allowed air to flow all around the tam.

The plate standing on a bowl

Drying

Depending upon your drying area and the size of the piece, complete drying may take a couple of days. Natural drying is best, but you could also place a dehumidifier in the room with the blocked piece to speed the process. Never leave the blocked item in direct sunlight.

Conclusion

Blocking is really a matter of common sense, knowing your knitting shape, and having a few simple tools to help you. I hope that you will give it a try, I promise you will be amazed at the results!

Beaded shawl on the blocking mat

Close-up of Asterope shawl showing the attention to detail bringing out the delicate lace points